Showing posts with label soy free. Show all posts

Wednesday, April 29, 2015

Easy Gluten Free Corn Dog Muffins

   Last week, while the kids and I were talking about the coming fair in our town, Child#2 and Child#3 both made a wish.  Both were hoping they could eat a corn dog just like their other siblings.  Yes, my eldest and youngest recently outgrew their allergies and both were to order corn dogs when we eat out.   

    As a food allergy mom, simple requests such this always pinch my heart. No matter how many years we've managed their food restrictions without any complains, hearing them long for something especially food makes me really uncomfortable. If I only knew how to make their allergies go away.  

     Then with some divine intervention, a packaged containing a GF Jules corn bread mix arrived in my house.  It was a prize I won in one of Vegetarian Momma's giveaway I entered in months ago. What a coincident right? 


     Since I haven't really tried making my own corn dogs on a stick, I asked the kids if they would be interested to try a Corn Dog in the shape of a muffin.  To my surprise, they were all excited with the idea.  They just reminded me of the two things that are important to them --- taste and the surprise in the middle.  

     Without any coercing, I gathered all my ingredients and said a quick prayer to make sure that the end result will turn out good.  After carefully preparing the batter and making sure I totally covered the kielbasa slices, I crossed my fingers while I waited for it to bake.  

   The final product as you can see below is beautiful. Though it's not as brown or yellow as most corn breads are, the muffins were very moist and delicious. Even if the sausage in the middle gave off some of its juices, it didn't make the inside soggy.  In fact, it made it more flavorful.  

     It was really a fun and yummy experiment. Thank you GF Jules and Vegetarian Momma for making it easier for this mom.  As you may have already known, the kids' smiles brought by these simple treats are indeed priceless. 

      Are you ready to give this recipe a try? Let me know how it went.  

- Roz  


Ingredients:

1 box GF Jules Gluten Free Corn Bread Mix
2 6 oz. containers So Delicious Coconut Yogurt (vanilla flavor)
1/2 cup So Delicious Coconut Milk (sweetened vanilla)
1/2 Harvestland Polish Pork Kielbasa
1 Tbs. flax meal
3 Tbs. lukewarm water

Optional toppings:
1/4 cup Daiya Cheddar style shreds
2 Tbs. Earth Balance Buttery Spread (soy free for us)


1. Fill a saute pan with 2 cups of water.  Add the kielbasa and bring the water to a boil. Then let it simmer for 10 minutes. Take off from heat and set aside.
2. While heating the kielbasa, preheat the oven to 400 F. Line about 15 muffin crevices with either silicone cups or paper liners.
3. In a small bowl, combine the flax meal and water to make a goo. Set aside for at least 5 minutes before using.
4. In a big bowl, with the help of a fork, whisk together the yogurt and flax goo until well incorporated.
5. Add the corn bread mix.
6. Slowly add the coconut milk. Mix well with a fork.  If the batter seems too thick add more coconut milk, 1 tablespoon at a time until the batter is smooth.
7. Fill the prepared muffin tins with the batter.  Make sure it each is just half full.
8. Cut the kielbasa into 1 inch thick circles.
9. Place one slice of kielbasa in the middle of each muffin.  Make sure that the meat is completely covered by the batter.
10. Bake in the oven for 20- 22 minutes
11. Remove from the oven and cool for a few minutes before serving.  The inside will be very hot.

Friday, February 27, 2015

Decadent Double Chocolate Muffins Gluten Free Vegan

      It's been a while since I posted a baked dessert recipe here on the blog. That doesn't mean though that I've stopped experimenting in the kitchen.  If you've been following me in Instagram, Facebook or Twitter,  (I hope you are.) I'm sure you are aware that I'm spoiling the kids too much by always giving them freshly baked goods.  Hey, it's part of my job as a mom right? 

      Among the pictures I posted on Instagram lately, this Decadent Double Chocolate Muffins got the most requests for me to share the recipe.  I guess describing it super moist and made with lentil flour generated some extra curiosity.  What do you think?  Does it sound intriguing? 

    Anyway, for the past few months, I've been testing several protein rich naturally gluten free flours such as lentil, chickpeas, mung bean and even tiger nuts.  Child #3 in particular needs extra protein. Aside from that, we're already big rice eaters so I want to produce treats that are not only yummy but healthier as well.   

     While I'm writing this post, I've been going back and forth whether I'll call it a muffin or a cupcake.  Unlike most muffins, these are very light, soft and spongy.  The texture close to an angel food cake.  Without icing though, I can't officially call these cupcakes.  Anyway, I just decided to call it muffins.  If ever you need to make cupcakes, you can make these and top it with some healthier Creamy Chocolate Frosting.  I'm sure it will be a hit to any party.  

         Who says you have to feel guilty when you eat something decadent?  Give these a try and let me know what you think.  

          Have a great weekend!

- Roz


Ingredients:

2 Tbs. ground flax seeds
6 Tbs. water
1/2 cup unsweetened applesauce
1 cup nondairy milk ( I used flax milk)
2 tsp. apple cider vinegar
1/4 cup avocado oil (or canola, grapeseed)
2 tsp. vanilla extract
1 cup organic raw sugar
1/2 cup chocolate chips

Flour mix
1/4 cup arrowroot flour
1/3 cup potato starch
1 cup lentil flour
1 Tbs. baking powder
1/2 tsp. baking soda
1/2 tsp. sea salt

1. Preheat oven to 375 degrees F.  Line two (12 standard sized) muffin tins with cupcake liners or silicone cups.
2. In a small bowl, combine the flax seed and water to make .  Mix well and let it stand for at least 5 minutes.
3. Add the apple cider vinegar to the non dairy milk. Stir and set aside.
4. In a medium size bowl, shift the ingredients of the flour mix.
5. With the mixer running, cream the sugar, avocado oil, apple sauce and flax seed goo until light and fluffy.
6. Alternately add the flour mix and non dairy milk.  Start and end with the flour mix.
7. Mix for about 1 minute.
8. Stir in half of the chocolate chips.
9. Fill prepared muffin tips up to 3/4 full.
10. Top with remaining chocolate chips.
11. Bake at 375 degrees for 10 minutes.
12. Reduce the oven temperature to 350 and bake for another 10-13 minutes or until the toothpick inserted in the middle comes out clean.
13. Remove from the muffin tins and let it cool on top of a cooling rack.
14. Enjoy!

Friday, September 5, 2014

Review & Giveaway: Ola! Foods Granola

      It has been a roller coaster week!  From trying to squeeze in some last minute summer activities, preparing for the kids' first day of school, managing the household and yes, stealing some time to "work", I can't blame myself for sleeping on the couch the last 2 nights.  What?  At least, I was able to get some snooze.  

      Anyway, today I finally had some undivided hours to finish the endless drafts I have sitting on my computer. This one for sure will get you really excited.  

      Have you heard about the company called Ola! Foods?  Before the GFAF Expo last year, I haven't either.  However, after meeting it's founder, Dina Houser in their booth, I couldn't help but not only enjoy their delicious products but support their very generous cause as well.  

      For starters, Ola! Foods is a Connecticut based business that makes 100% natural granola. Aside from being completely gluten free, their products only contain minimal ingredients that we, consumers can immediately understand.  It is lightly sweetened with pure maple syrup which makes it healthier than most commercially available brands.  By using only the best pure ingredients, they were able to create their granola really flavorful and yes guilt free addictive.  

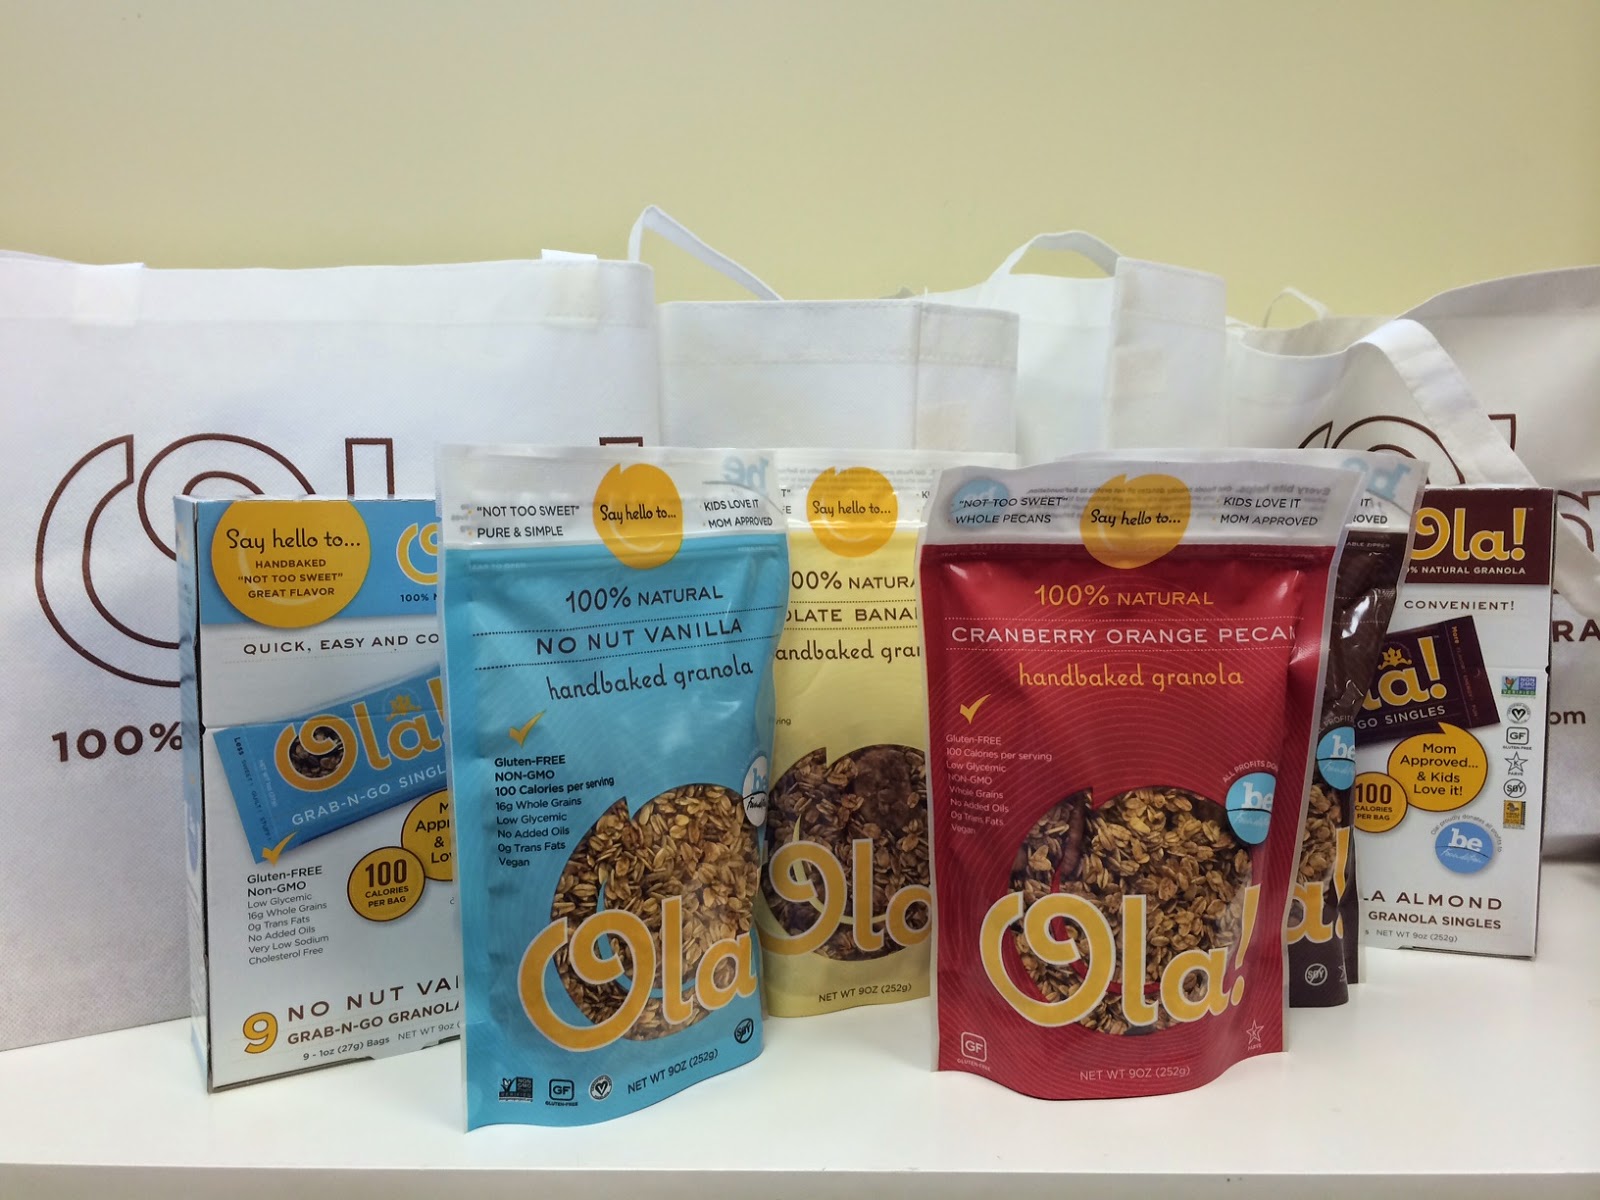
      Ola! Granola comes in 4 yummy flavors namely Cranberry Orange Pecan, Vanilla Almond, No Nut Vanilla and our family's favorite Chocolate Banana Chip.  Since we are NUT Free at home, the company sent me the last two varieties to try.  

      At first, I was quite hesitant to give let the kids (except for for Child#1 who outgrew her nut allergies) to try it.  This is mostly because of the Allergen warning that says "Ola Foods follows good manufacturing practices to segregate ingredients to avoid cross contact with allergen.  Made in a facility that uses Tree Nuts.  However, after some testings, I found out that it was safe for the other kids to eat as well.  Yay! Happy dance!  

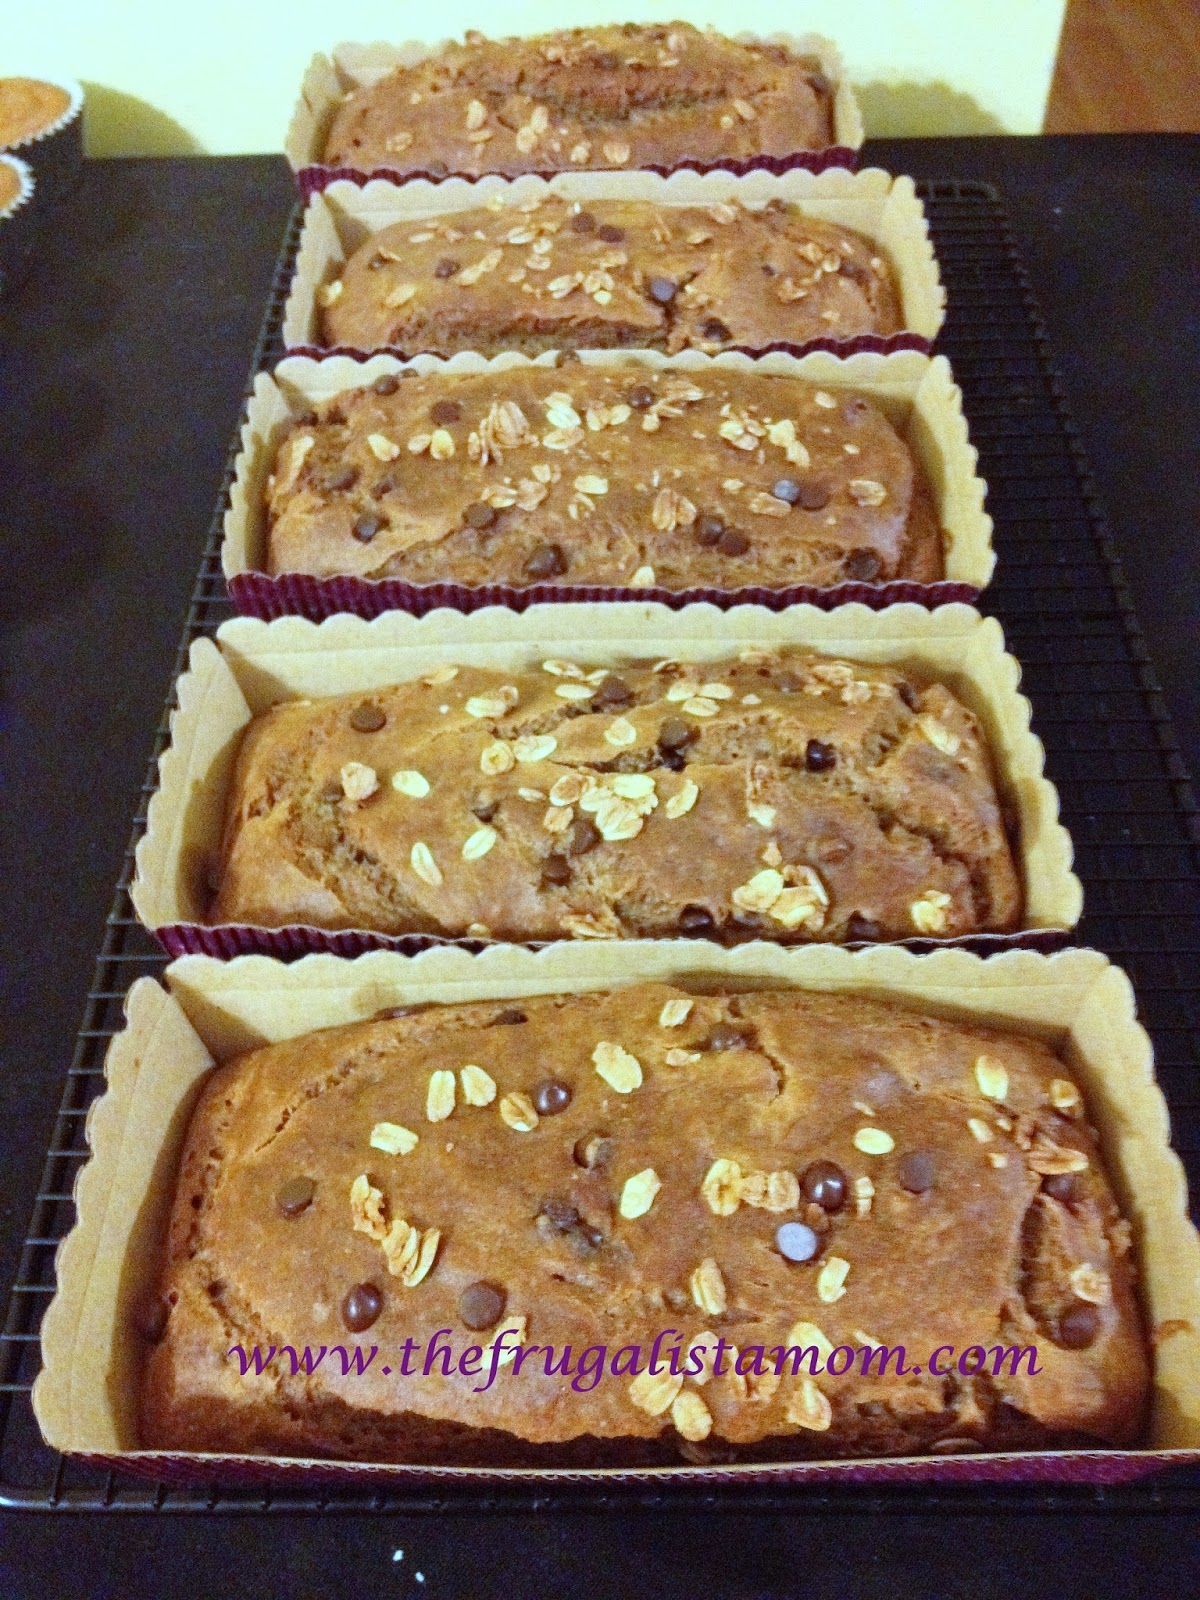
      Since that revelation, it became a staple in my pantry and even baked goods.  Shhh... it's the secret ingredient of the Chocolate Banana Bread that was a big seller at last year's Bake Sale Fundraiser.        


        Another important thing why I'm passionate about Ola! Foods is their commitment to not just provide healthy and yummy snack options but to help disadvantaged youth, their families and communities.  Did you know that all of their net profits (Yes you got that right 100%) are donated to BeFoundation?  This organization provides grants to support the education of disadvantage kids. They provide funding for education innovations, exposure to arts and music, nutrition for the body & mind and most importantly community development and involvement. 

       By supporting Ola! Foods, we are not just getting healthier physically, we are also making a change to make the future generations a lot better.  Is that cool or what? 

        Now for the best part of this post.  
     
        Our friends from Ola! Foods would not only like you to try their products. They are helping you stock up this back to school season.  One lucky reader will get an Ola!Foods Gift Pack worth $45. This includes:

        (1) Ola Tote Bag
        (1) 9 oz bag of No Nut Vanilla  Granola
        (1) 9 oz bag of Banana Chocolate Chip Granola
        (1) 9 oz bag of Vanilla Almond Granola
        (1) 9 oz bag of Cranberry Orange Pecan Granola
        (2) Trays of the 1 oz Grab and Go Singles


          Isn't that a big treat?  Oh before I forget, this giveaway is open to all US Residents only.  What are you waiting for join now.  This giveaway will end on Sept. 16, 11:59 pm EST.   


a Rafflecopter giveaway

Thursday, August 21, 2014

Easy Pizza Recipe - Gluten, Egg, Soy, Dairy and Nut Free

      Oh Pizza!  What would the world be without you?  This simple yet well loved concoction of dough, sauce and cheese has become a staple in almost every children's parties and school activities.  

      I can still remember my kids' reaction when I first told them about their food allergies. "No wheat and dairy!  That means we can't have pizza anymore?" "What will happen if there are parties?"

       Trying not to be defeated, I promised my children that we will make our own. I told them that I will look for recipes and they have to tell me which one is the best.  That conversation was about four years ago.  After countless testings and experiments, we were finally able to agree which one will be our favorite and reliable pizza recipe.

       For starters, making your own pizza isn't complicated at all.  After all, a pizza is just composed of these:
     
1.The Crust

     If you ask me what is the most important ingredient in a pizza, my answer will be hands down the Crust.  Whether you like it thin and crispy, thick and chewy, nothing turns me and my kids off a pie than a soggy or teeth breaking crust.  

    Over the years, I've tried quite a number of gluten free pizza dough mixes and even tried making some from scratch from the recipes I've seen online. Though my kids were happy to eat whatever I make, some crusts came out cracker like or worse, slimy in the middle.  Finally, we had our favorite which is King Arthur's Gluten Free Bread and Pizza mix.  Just follow the instructions on the side of the box to the tee.

      Here's the list of ingredients I used:
      1 box King Arthur Gluten Free Bread & Pizza Crust Mix
      1 1/4 cups lukewarm water
      4 Tbs. olive oil + additional 4 Tbs. of olive oil for pans and drizzle
      3 Tbs. ground flax seed
      9 Tbs. hot water

    Since we can't have eggs (the ingredient required on the box), I use flax goo (flax seed and water mentioned above) as the substitute. That's the brown flecks on the picture.  I like using flax because it adds extra protein and nutrients to my dough as well.

      Preparing the dough usually takes about a full hour.  That includes the proofing time. The good news is that,  once the crust was pre-baked (the first baking before you add the toppings), it can be frozen for future use.  Oh before I forget, one box of King Arthur's GF Pizza mix will give you enough for two thin pie crusts.


         Here's what the dough looks like after mixing.  It puffs up a bit after the resting period.     


2. The Sauce

        This is one of the easiest part.  I don't need to complicate things by looking for a gluten, soy, dairy, egg and nut free pizza sauce.  Your favorite Marinara sauce works well.  I often have homemade ones in the freezer but I also stock up.  Our go to brands are Wegman's Organic Marinara and Simply Nature from Aldi's.  

3. The Cheese

         One of the trickiest as nothing beats the flavor of the regular dairy ones.  After so much trials and errors, I found out that the Daiya one works best.  To achieve that complex flavor, I would use  three varieties.  Usually, it's the Mozzarella, Jack and Cheddar.  A little goes a long way so there's no need to panic and finish 3 packages for 1 or 2 pies.  


4. The Toppings

      From grilled chicken to canned pineapples, our choices for toppings are endless. If we are having pizza at home, we tend to get more creative.  Oftentimes, we use all the leftovers in the fridge.  For school parties, we usually stick to the basics.  Some of the kids' favorite includes Applegate Farms Salami or Pepperoni and Wegman's Organic Turkey or Ham. 

        
        So, that's my easy recipe.  As long as you got the pantry ingredients and the pre-baked crust on hand, whipping up a pizza for a party or school activity is a breeze.  I hope you will find this handy as the kids go back to school.  

 - Roz       
           

Friday, August 8, 2014

Gluten Free Banana, Cinnamon and Oat Muffins

     I can't believe the back to school craze is already in full swing. Three more weeks and another routine will come about.  What's the biggest change? My beloved Child #4, my baby, is going to Kindergarten this year! Yup, all four children will be out of the house.  Finally!

   Before I get too emotional, I would like to share with you the kids' all time favorite Banana, Cinnamon and Oat Muffins.  This recipe has gone through several ingredient changes until we, as a family, decided on the best one. Don't be afraid of the multiple steps.  The extra dishes are totally worth it.

    These muffins are are moist, light and really healthy. The flax seed and milk are not only rich in protein but omega 3's as well.  Sorghum is not only gluten free, it is also an excellent source of fiber, thiamine, niacin, riboflavin and trace minerals like iron, phosphorus and potassium. Convinced already?

   Also, by keeping the sugar content as low as possible and relying on the sweetness of the bananas, I was able to make this a delicious breakfast treat.  It's portable and a nice addition to packed lunches and after school snacks.  Top it with some frosting, powdered sugar or melted chocolate and you'll have a better for you, food allergy safe cupcakes. Sounds good?

  The recipe yields about 18 standard sized muffins which stay good for 2-3 days at room temperature.  I'm sure you can easily freeze some for future snacks.  In my household though, a batch just lasts for a day.  That's how much they love it.

    Hope you'll get to enjoy this yummy and healthy muffins soon.  If you have any questions, just let me know through the comment section below or send me a message.  I'm more than happy to answer them.

     Enjoy the weekend.

- Roz      


Ingredients:

1 cup sorghum flour
1/2 cup oat flour (gluten free of course)
1/4 cup tapioca starch
1/3 cup potato starch
1 Tbs. baking powder
1/2 tsp. baking soda
2 tsp. ground cinnamon
1 tsp. ground nutmeg
1/2 tsp. sea salt (fine)
1/2 cup organic cane juice (sugar)
1/4 cup avocado oil (you can also use canola or sunflower oil)
2 Tbs. ground flax seed
6 Tbs. lukewarm water
1 cup mashed bananas (over ripe ones are the best)
1/2 cup flax milk (or any dairy or non dairy milk of your choice)
1 tsp. apple cider vinegar

1. Preheat oven to 375.  Line muffin tins with paper cups or silicone muffin cups.
2. In a small bowl, combine the flax seed and water.  Let is sit for at least 5 minutes before using.
3. Except for the sugar, put all the dry ingredients in a medium sized bowl and whisk until thoroughly mixed.  Set aside.
4. Add the vinegar to the milk and let is stand for 3 minutes to make a non dairy buttermilk.
5. In a big bowl or the bowl of a mixer, cream the oil, sugar and flax goo.
6. With the mixer running on low, alternately add the dry ingredients and non dairy buttermilk.
7. Add the bananas and mix for about 1 minute.
8. Fill prepared muffin tips with batter. Make sure to leave about 1/2 inch space on top.
9. Bake for 10 minutes.  Then reduce the oven temperature to 350 degrees and bake for 8 to 10 minutes. It is ready when a toothpick inserted in the middle of the muffin comes out clean.
10. Remove from muffin tins and cool on a baking rack.
11. Enjoy!

Wednesday, July 30, 2014

7 Days No Sugar Challenge - Day 2

      Temptation Day!

      Yesterday started really good.  Thanks to my growing tea collection, I was able to treat myself with a nice big cup of The Republic of Tea's Mango Ceylon . The strong aroma of mango made the tea somewhat sweeter naturally.  It matched perfectly with our family's breakfast of Sauteed Corned Beef with Onions and boiled quinoa. Since I forgot to take a picture of my meal, I used a photo of the dish which I took a while ago. As you can see, I didn't discovered quinoa then so the background was steamed white rice.  Still gluten free though. 


      We arrived home around 11:20 am from the kids' swim class.  They are a little tired for a big meal so I allowed them to have a snack while I do some writing.  Then, the first temptation came. While the kids were enjoying their food allergy friendly SUGAR cookies, they decided to offer me one because according to them "It tastes really good." I almost grabbed a piece when I saw the packaging.  I told I am thankful for the sweet offer but right now Nanay (mom) is not having any sugar. Since food restrictions are common in our household, it is no longer a big deal when one food has to be avoided.  Ah! That was close one though! 

      For lunch, I had the same as Day 1's which is Pork Menudo with quinoa.  I cook big batches remember?  

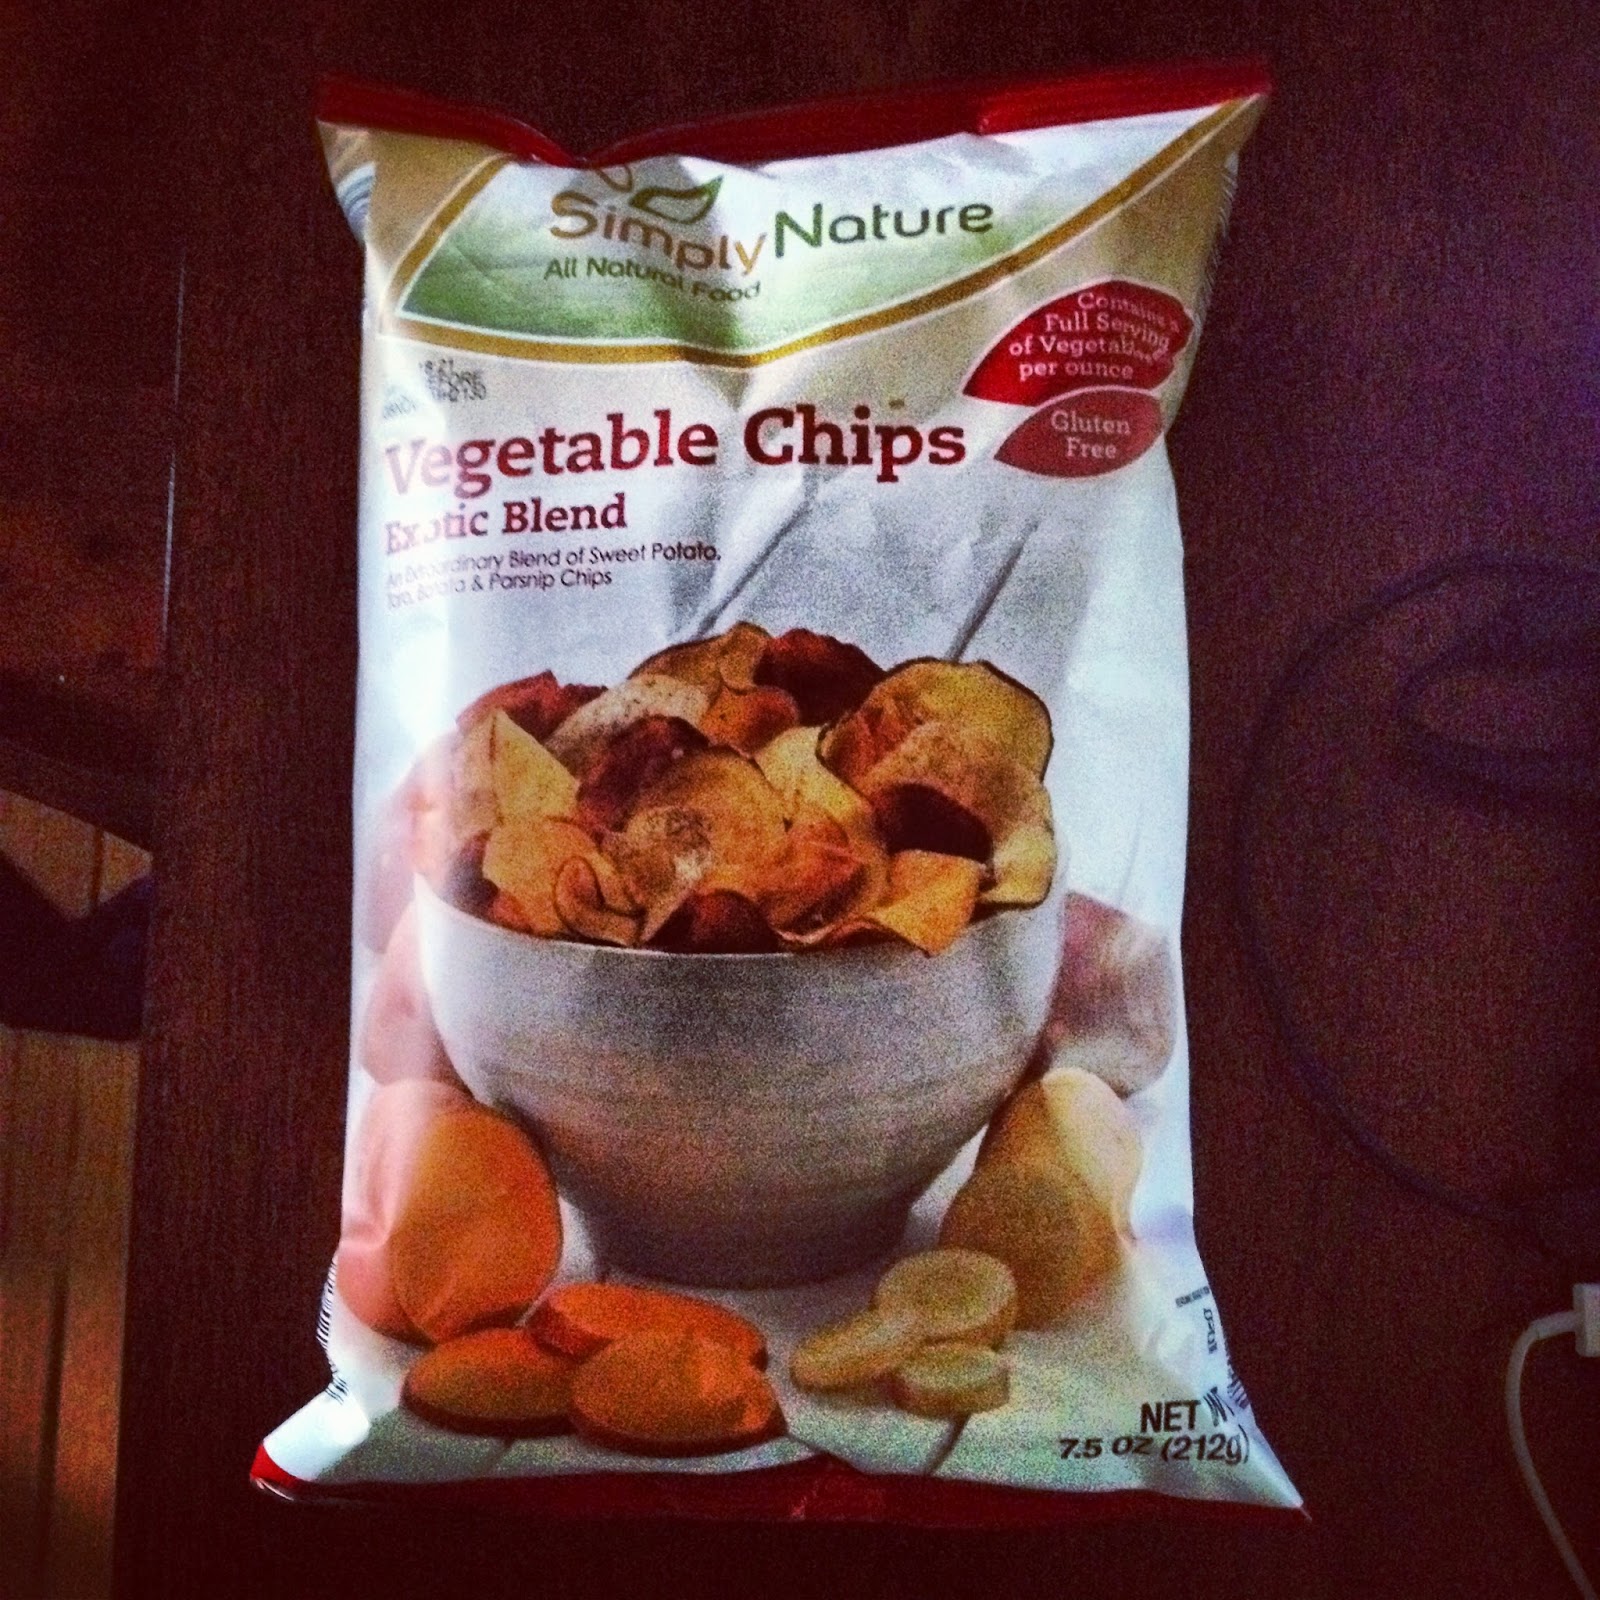
    The second temptation came after lunch.  The kids asked me if they could have dessert.  Both of my sons are actually underweight so I grab every opportunity to give them extra calories. What's for dessert? Melted semi sweet chocolate and marshmallows! Thank God Child #3 had a strong urge to try this new Vegetable Medley chips.  Not only is it food allergy safe, it has no sugar as well.  The sweet potatoes in it helped satisfy that sweet craving on the go.


      When we got back home from Karate class, it was time to prepare for dinner.  I've made this easy and well loved Indian Spiced Roasted Chicken.  Since I don't have hours to cook a whole chicken, I cut it in serving pieces before roasting. This reduced the cooking time to about 1 hour in the oven.  


      Since it was a busy day for all of us and I didn't have my afternoon java fix, I felt so tired after dinner.  Too tired to even think of dessert!  I easily fell asleep.  However, I was up a few times during the night. Is it due to sugar withdrawal?  What do you think? 

- Roz
      

Tuesday, July 29, 2014

7 Days No Sugar Challenge - Day 1

    Yesterday was the start of the 7 Days No Added Sugar Challenge. For a self confessed dessert fanatic, this is a real big deal.  As a little trivia, it was my sweet tooth that motivated me to teach myself how to bake again after my children were diagnosed with food allergies. I remembered the day when I told my kids this "Just because you can't have wheat, dairy, egg, soy, nut and peanuts, does not mean that you also can't have a cupcake, doughnut or ice cream.  We will make our own!"  That was almost 4 years ago and up to now I haven't stopped.  

     Anyway, when I was asked about the challenge.  I didn't hesitate a bit.  For months now, I have been curious about the growing Sugar Free diet trend. While researching about food allergies and the importance of gut health, big importance was emphasized regarding the bad effects of both natural and artificial sweeteners.  

     Day 1 turned out fine.   Even though the challenge allowed the use of a little stevia, I opted to be a purist and have only the natural sugars in fruits and vegetables.  What did I ate?  


For breakfast, I had a protein packed one which consisted of:
       1/4 cup cooked quinoa
       3 Tbs. Oven baked breakfast potatoes
       1 pc. organic hotdog 

      Since I can't have my favorite light and sweet coffee, I had a big mug of Double Green Matcha Tea.  


     The kids have their swimming lessons the whole week. So for lunch, we all had the stew which I cooked yesterday.  They usually eat theirs with steamed white rice.  For me, it was  
      1/4 cup cooked quinoa
     1/2 cup Pork Menudo (Pork chunks, potatoes and bell peppers slowly simmered in a seasoned tomato sauce)


     Since I started to crave for something sweet around 4pm, (the kids were having marshmallows dipped in melted chocolate for snack), I decided to make a smoothie with the fruits I have on hand. This one had strawberries, blueberries, banana, flax milk and some ice.   I had about 2 cups worth of smoothie so I'm still full.  Oh before, I forget, I also had a handful of low sodium potato chips. With four kids enjoying their food right in front of me, it is so hard to resist.

        For dinner, I had a bowl of Pork Spareribs Sinigang (pork and vegetables boiled in a tamarind based broth).   We had a late dinner because we went grocery shopping.  This probably helped because I never even thought of dessert afterwards.  Maybe the 2 liters of strawberry infused water which I kept drinking the whole day might have helped too.  What do you think?

         So far, so good.  Will it last?  Let's see...


- Roz


Saturday, July 26, 2014

Feel Good Balsamic Chicken Skewers

     "Have no fear of perfection - you'll never reach it."  - Salvador Dali     

   It's been 11 years since I became a mother. That's over a decade of obsessing over my children's clothes, manners, school work, feelings, schedules, parties and the list goes on. Honestly, I can't even recall how many books, e-books, guides, and even blogs I've read just to make sure that I'm on top of our family's activities.  It even came to a point wherein I gave each child his/her designated pen color on the calendar so that I will not miss anything.  OCD alert!

    Then, once in a while, no matter how organized and effective our systems can be, there will be occasions when we just "slip up".  Whether your child has food allergies or not, those rare incidents often leave a tremendous mark in our conscience.  An instant self nomination to the "Worst Mother of the Year Award." 

     My latest nomination happened just before the school ended, I mistakenly thought that Child #3 doesn't need to bring lunch for school anymore.  Since it was the start of the week long early dismissal days, I only sent a package of his favorite seaweed snack and a handful of grapes.  

   "What can possibly go wrong? It was only a Field day and  he will be out at 1 pm."   

    With less than an hour before dismissal, I received a call from the school.  The secretary told me that I need to pick up my son because he has crying inconsolably and it was after the PTO provided the whole school with pizza for lunch.  Panic suddenly crept in.  I immediately asked her if the nurse knew about it and if they administered an Epi-pen shot.  What a huge relief when she told me, my son didn't eat the pizza and in fact, he was not given any at all.   

    When I arrived in school, the principal and his teacher told me about the lunch room incident and my son's refusal to talk to anybody.  At that time, he was already calm inside the classroom and has even asked his teacher if he could wait until dismissal to go home.  A request she gladly approved. 

     On our way to the car, I asked his side of the story.  Tears flowed right away and he told me he was really hungry and there was no food to eat.  He knows he can't have the free pizza and he's only allowed food from his lunch box. It was not about the pizza, it was the fact that he has no food for lunch because he ate all of it during snack time.  He said that he doesn't want to tell them (the teachers and staff) that there's nothing left in his lunch box.   When I asked him why he didn't call me, (our house is less than 1/2 a mile from school and I'm home that day), he said he was really sad to talk.  Heart breaking enough?

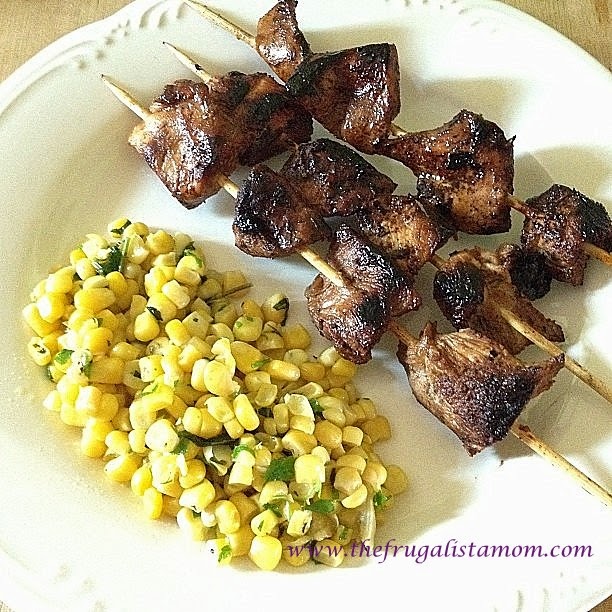
    I don't know what else to do to comfort him than promise him that when we get home, he'll have his favorite chicken BBQ with Herbed Sweet Corn. Thank God, I have these marinating for days in the fridge! Within a few minutes, he happily ate his late lunch with a big smile.  Yes! I was forgiven too.  

     This simple and easy to prepare dish is not only comforting but a real crowd pleaser. The trick is it to let it marinade for a long time. It can be stored in the fridge for 3-4 days or longer in the freezer.  It can be cooked on the grill, in the oven and even on the stove top.  

     The combination of sweet, sour, salty and spice is very child friendly. Since the meat is flavored without a sticky and messy sauce, these skewers are perfect for potlucks and even kids' lunch boxes.  For a more grown up version, add a pinch or more of powdered cayenne pepper.  You can also serve it with your favorite dipping sauce.  Child #1 likes it with bottled BBQ sauce on the side while Child #2 likes it with ketchup.  
      
     Is there a dish you often serve to your child when he/she had a bad day?  Love to hear what it is.  
   

- Roz


Ingredients:

1 1/2 lbs. boneless, skinless chicken thighs (or chicken breast)
1 1/2 cup balsamic vinegar
1/2 tsp. ground black pepper
2 tsp. garlic powder
2 tsp. sea salt
1/4 tsp. chili powder

1. Cut the chicken thighs in half.  About 2 inch squares.
2. In a glass container with lid, whisk the vinegar, black pepper, chili powder, sea salt and garlic powder until well combined.
3. Add the chicken pieces and make sure it is well covered with the seasonings.
4. Cover and marinate at least 24 hours in the refrigerator.
5. Thread chicken onto skewers.
6. Lightly oil the grill plate and cook for about 7-9 minutes on each side or until the chicken is cooked through.
    If using the oven, broil for about 8-10 minutes on each side.
    Stove top, lightly grease a cast iron skillet or grill pan.  Place the chicken skewers when the pan is starts to smoke.  Cook for 6-9 minutes on each side or until the juices run clear.


Monday, July 14, 2014

Deal Alert: Food Allergy Friendly Desserts at ACME Superstore

 Last night, instead of going to an ice cream shop for dessert, I headed to the local Acme Superstore.  There are some great deals which I can't help but share.  

      Just a quick note, most sales on Acme run Friday to Thursday.  This deal will be available until July 17, 2014.

      Time to stock up. 

-Roz


     Philly Swirl Cups with Candy (6 cups a box) - $3.99 regular price
     On Sale for $2.99 
     Used $1.00 Coupon (from Sunday paper last month)
     Final price : $1.99/box


     Luigi's Italian Ice (6 cups a box) - $4.99 regular price
     On Sale for $1.99 
     Used  $1.00 for 2 Coupon (this Sunday's paper)   
               $0.50 Coupon (from a previous box)
               $0.50 Store match coupon discount
     Final price : $3.97 for 3 boxes


     Enjoy Life Chocolate Bars - $1.99/pc. regular price
     On Sale for $1.79 

     Goldbaums Gluten Free Ice Cream Cones - $4.99/box (12 pcs.)
     On Sale for $3.79

Friday, June 13, 2014

Protein Packed Gluten Free Coconut Chocolate Chip Cookies

      Do you like cookies? My children do! In fact, if they could get away with it, each will finish a dozen in one sitting.  That's about 48 pieces for a quick snack.  I know what you're thinking. Junk food!

     Since their food allergies don't allow them to have the regular cookies anymore and the FA friendly ones are quite pricey (to my relief!), I decided to start tinkering in the kitchen to make something as close as possible to the "real" cookies but healthier.  Inspired by the Fudgy Black Bean Brownies which the kids can't have enough,  I was able to nail one easy to make recipe. Guess what? I'm sharing it to you today.

      If you notice that the recipe requires one whole can of cannellini beans, don't freak out and run. That is the secret why I called these cookies "Protein packed" in the first place. You can keep a secret right?

       Still hesitant?  Trust me, the end product is so worth it.  The cookies are soft, chewy and melt in your mouth delectable.  With chocolate, vanilla and coconut combined, what can possible go wrong? Plus, you can let the blender or food processor do the hard work for you.

      Most importantly, these cookies will not make you feel guilty when you grab one or two or even three.  So, are ready to try them out?  Let me know how they turn out.

     Have a fantastic weekend!

- Roz


Ingredients:

1 15 oz can cannellini beans (rinsed and drained)
2/3 cup sugar (preferably raw or organic)
1/3 cup pea butter (you can also use sun butter, peanut, almond or cashew butter)
1/3 cup coconut flour
2 Tbs. sweet rice flour (optional)
1 tsp. baking powder
1 tsp. vanilla extract
1 Tbs. sugar
1/3 cup coconut milk
1 cup semi-sweet chocolate chips (I use Enjoy Life)

1. Preheat oven to 375 degrees. Line 2 cookie sheets with parchment paper or silpat.
2. In a blender or food processor, puree the beans, 2/3 cup sugar, pea butter, coconut flour, rice flour, baking powder, vanilla extract and coconut milk.  Make sure the mixture is well blended and smooth.
3. Stir in 1/2 cup of chocolate chips.
4. Using a 2 Tbs. ice cream scoop or 2 spoons, make 12 round equally size mounds on a prepared cookie sheet.
5. Dip a fork in the remaining 2 Tbs. of sugar and use it to flatten the cookies to about 2 inch circles.
6. Decorate the cookies with the leftover chocolate chips.
7. Bake for 18 minutes or until the edges are golden brown.
8. Remove from the oven and carefully transfer to a wire rack to cool.
9. Serve immediately.
10. Place leftovers in an air tight container for up to 3 days.

Thursday, April 24, 2014

Food Allergy Friendly Snack: Chow Chow Recipe

       Have you ever been in this scenario?  Your children have begged you for days or weeks to buy  a certain brand of cereal.  Then when you finally gave in and bought a box or two, each would excitedly eat about a cup.  After that initial tasting, the coveted product will find its way in the cupboard where it will join the rest of  the half finished containers of cereals.   

      I confess,  no matter how I try to be strict about this issue,  I always end up with a collection of cereal containers.  Though many would tell me, if nobody wants to eat it, just get rid of it.  The frugal in me often prevails.  How can I possible throw away food especially if I know that it is still good? Don't forget too that we are buying food allergy friendly and organic as possible.  So, those are prime commodities baby! 

       Before the food allergies, whenever I have the urge to clean the pantry,  I often crush those unwanted cereal into tiny pieces.  Depending on the kind, I add some to cookie batters, use it as muffin toppings and even crust chicken tenders with it. Since I started buying the more expensive types of cereal, I realized that I don't even have the courage to break those crunchy stuff into smaller pieces.  

       One day, while trying to bribe my Child #1 to eat some of these "forgotten" cereals, she asked me why I'm not making Chow Chow anymore.   It was one of her favorite snacks when she was younger. Also, the primary reason that kept her eczema from popping all over her body though.  

    Since I'm more confident now in making traditional recipes, allergy friendly, I immediately looked for my treasured recipe binder.  I know for a fact that the recipe isn't complicated.  Plus, I'm sure I have my reliable and tested product substitutes on hand.  Then the experiment began.

      To my surprise, the first try was a huge success.  Everybody not only gave the new Chow Chow recipe two but four thumbs up each.  Can you guess where they got the other two thumbs?  Anyway, this treat has become a staple in our monthly menu.  The new challenge for me is to make a batch last for at least 3 days.  

      How about you?  What do you usually do with those half eaten open bags of cereal?  Do you have any interesting recipes you would like to share?  I love to hear from you.  

- Roz


Ingredients:

     9 cups cereal (gluten free of course!)
     1 cup semi sweet chocolate morsels (I used Enjoy Life Foods Mini Chocolate Chips)
     1/2 cup Peanut free butter (I use No Nuts Golden Peabutter )
     1/4 cup non dairy butter substitute
     2 1/2 cups powdered sugar
     1 tsp. vanilla extract


1. Put the powdered sugar in a gallon size ziploc bag.  Set aside.
2. In the big microwavable bowl, combine chocolate, peanut butter substitute, non dairy butter and vanilla.
3. Heat the bowl in the microwave just until the chocolate chips are melted.  It usually takes about 40 seconds on high.
4.  Mix until well combined.
5.  Add the cereal and mix until the everything is coated with the chocolate mixture.
6. Immediately put the cereal mix in the bag with the powdered sugar.  Close and shake until the cereal is coated.
7. Pour the mixture on a flat tray and let it cool.
8. Transfer into containers with lid and store in the refrigerator.
9. Serve cold or at room temperature.

( I am a member of Amazon's affiliate program and the links I've included in this post will direct you to that site.)

Tuesday, April 15, 2014

Gluten Free and Vegan Cranberry Oat Muffins

       It's the first day of Spring break in our home.  Do you know what that means? There will be non stop cooking, baking and entertainment for the kids.  Are we having a party?  Not really.  It just so happens that when my school age children have no school, all the food seem to fly off the pantry and fridge.  Have you experienced that too?

        Anyway, I realized that it has been a while since I posted a recipe.  So today, I'm sharing with you one of the family's new favorite snack and weekend breakfast treat.  These easy to make muffins are very light, it can pass as a delicious cupcake base.  It's also filled with healthy dried cranberries (kids' new fruit to try) which give that sweet and tangy flavor we all love.

        If you are looking for something new to serve for Easter brunch or just a healthier lunch box treat, I suggest you give this one a try. Even those who aren't vegan or in a gluten filled diet will never know the difference.  As my kids' say "It's 4 thumbs up!"

       Have a great week my friends.


- Roz


Ingredients:

1 cup oat flour
1/2 cup rice flour
1/3 cup potato starch
1/4 cup tapioca starch
1 Tbs. baking powder
1/2 tsp. baking soda
1/4 cup avocado oil (you can also use canola, coconut or sunflower oil)
2/3 cup raw organic sugar
2 Tbs. flax meal
6 Tbs. lukewarm water
1 cup unsweetened applesauce
1 tsp vanilla extract
2/3 cup dried cranberries

1. Combine the flax meal and water in a small bowl to make a flax goo.  Set aside for at least 5 minutes before using.
2. Preheat the oven to 350 F.  Line muffin tins with paper baking cups.  This recipe makes about 16 - 18 standard sized muffins.
3.In a bowl, whisk all the dry ingredients (flours, starches, salt, baking powder, baking soda and salt).
4. In another bowl, with the help of a stand up or handheld mixer, cream the oil, sugar, flax goo, applesauce and vanilla extract.  This takes about a 1-2 minutes.
5. Withe the mixer running, slowly add the flour mixture.  Mix until the flour is well incorporated and there are no lumps.
6. Stir in 1/3 cup of dried cranberries.
7. Fill the muffin tins 2/3's full with the batter.  Top with dried remaining cranberries.
8. Bake for 20-25 minutes or until a toothpick inserted in the middle of a muffin comes out clean.
9. Serve warm or at room temperature. Top with powdered sugar before serving.

Tip: If you can have white chocolate, melt some in the microwave and drizzle on top of the muffins before serving.

Monday, December 9, 2013

Slow cooked Balsamic Chicken aka Soy free Chicken Adobo

       We just had our first teaser of snow here in New Jersey.  Though I'm praying for at least 12 inches, my luck ran out.  Oh wait, let's see how much is in store tomorrow.  Winter is just starting after all. 

      With the arrival of the colder temperatures, the season also brings along cravings for hearty comfort food.  For a Filipino household in particular, what else can be more homey than a warm Chicken Adobo over streamed white rice?  Considered as the national dish of the Philippines, Adobo, is a pork or chicken stew slow cooked in a concoction of soy sauce, vinegar, garlic and black pepper. Simple yet the flavor is definitely complex and not to mention delectable. 

      The sauce alone mixed with rice is enough to make my children ask for seconds and even more. Can you just imagine the sad faces I got when I told them that we can't have the dish anymore because of the Child #2 and Child #3's soy allergy?  Since then, I it became my mission to recreate their beloved Adobo.  After countless attempts, finally, this recipe was born.  By using balsamic vinegar instead of the traditional white cane vinegar, the dish was able to get that familiar sweet and savory notes that soy sauce brings. Not to mention, the deep dark caramelized color.  

         Best part of it is that all the cooking is done in the crock pot.  Just mix, set and walk away. Kain na! (Let's eat!)

- Roz


Ingredients:

4 pcs. boneless, skinless chicken breasts  (cut in half )
6 pcs. boneless, skinless chicken thighs
2 Tbs. minced fresh garlic
2 tsp. extra virgin olive oil
1/2 cup chopped white onions
1 tsp. dried oregano
2 pcs. bay leaf
2 tsp. sea salt
1 tsp. ground black pepper
1 1/2 cup balsamic vinegar
1 cup chicken stock
1/2 tsp. chili flakes

1. Turn on the slow cooker to low.
2. Except for the chicken, combine all the ingredients in the slow cooker.
3. Add the chicken and mix well. Make sure all the pieces are coated with the sauce.
4. Cover and cook for 8 hours.
5. Serve over steamed rice and mixed veggies on the side.

Wednesday, November 6, 2013

Can't Get Enough Pumpkin Oat Muffins

      Ah, it's that time of the year again.  Orange is definitely the new black!  Okay people I'm not referring to the show.  In fact, I've never seen it at all even though we have a Netflix subscription.

       What I'm talking about here is the wonderful vegetable called pumpkin.  From coffee to soups to decorations, this fall must have is definitely all over the place. I don't know about your kids but in our home, pumpkin has taken over the top spot from chocolate.  Is that even possible? Looks like it.
   
      With so many asking for pumpkin recipes, I decided to share with you my secret Pumpkin Oat muffin recipe.  (I hope you all can keep a secret.) You will notice that it only requires one cup of pumpkin puree. I know what you're thinking.  What to do with the leftover puree?  Don't worry I assure you, one batch or even two will enough for everyone. My kids are devouring it like crazy.  I barely can keep up with the baking!

         Guess what?  Even my kids' friends who don't have food allergies love it. Give this gluten free, vegan treat a try this holiday season.  I'm sure your non food allergy friends and family will enjoy it too.


- Roz


Ingredients:

1 cup oat flour (I make my own using Bob's Red Mill Gluten Free Oats)
1/2 cup rice flour
1/3 cup potato starch
1/4 cup tapioca starch
1 Tbs. baking powder
1/2 tsp. baking soda
1/4 tsp. sea salt (finely ground)
1 tsp. cinnamon powder
1/4 cup oil (I used Organic Virgin Coconut Oil )
2 Tbs. flax meal
6 Tbs. lukewarm water
1 cup sugar (I used Organic Coconut Sugar )
1 cup pumpkin puree
1/2 cup non dairy milk (I used flax milk.  You can also use coconut or rice milk)
1/2 tsp. apple cider vinegar

1. Preheat oven to 350 F.  Line standard muffin tins with paper liners or grease with oil.
2. Prepare flax goo by combining the flax meal and water.  Set it aside for at least 5 minutes before using.
3. In a small bowl, make "buttermilk" by adding the vinegar to the non dairy milk. Mix and set aside.
4. Except for the sugar, whisk all the dry ingredients. 
5. With the mixer running, cream the oil and sugar.
6. Add the flax good and pumpkin puree.  Mix well.
7. In 3 batches, alternately add the dry ingredients and non dairy "buttermilk" to the pumpkin mix.
8. Scoop into prepared muffin pan.  Make sure each cavity is only 2/3 full.
9. Bake for 30-35 minutes. Use the toothpick test --- the toothpick comes out clean.
10. Let it cool in the muffin tins for 3 minutes before transferring to a cooling wire rack.
11. Top with powdered sugar for a festive look.

Makes about 18 standard sized muffins.

Wednesday, October 30, 2013

Chicken and Pesto Spooky Pasta

        Hello Friends!  It's been a while since I posted a recipe right?  To those who are following me on Instagram, thank you for reminding me. 
 
        Since we are celebrating Halloween, I decided to share with you my kids' favorite spooky food.   Funny thing is, I never imagined it as something freaky or even a Trick or Treating dinner staple.  It is pesto sauce for crying out loud! 
 
         I can still remember the first time they saw this dish.  They were so amazed because I was able to make a really "Spooky Pasta".  Was that even a compliment?  Anyway, the color definitely caught their attention and imagination.  The basil and spinach combo gave it a milder taste that the kids enjoyed.  If you have a "veggie - phobic" one just like my Child #2, don't even mention what the ingredients are.  The name "Spooky Pasta" can do the trick.  Green Eggs and Ham anyone?
 
         This kid friendly dish is very easy to prepare and all the components can be made ahead of time. As you may know, pesto can be frozen and so is cooked chicken.   So it is basically a reheat and serve type of dish.  Just make sure that your pasta is al dente to prevent it from being mushy.  Since it is also good at room temperature, it is an excellent lunch box idea.  Oh, did I mention that it's healthy too?     
 
        Happy Halloween!
 
- Roz


Ingredients:

1 lbs. cooked gluten free spaghetti
1/2 lb. chicken breast cut in to 1 inch cubes
1 1/2 tsp. extra virgin olive oil
1/4 cup pasta water (water used to cook the pasta)

Pesto:

1 tsp. minced fresh garlic (about 3 big cloves)
1 cup fresh basil leaves
1 cup fresh baby spinach
1/2 cup extra virgin olive oil (used the best that your budget can allow)
2 tsp. salt
1 tsp. ground black pepper
2 Tbs. canned cannellini beans (rinsed)
1/2  cup Daiya cheddar style cheese (if you can have dairy, use parmesan cheese)

1. Excluding the olive oil, put all the pesto ingredients in a food processor or blender.
2. With the machine running, slowly drizzle the olive oil. 
3. Once everything is well incorporated, stop the machine and set aside.
4. In a heated pan, sauté the chicken in olive oil.
5. When the chicken is cooked through, add the pesto.
6. After 2 minutes, add the cooked spaghetti and toss until the pasta is well coated with the sauce. If the sauce looks dry, add a little of the cooking liquid from a pasta.
7. When the pasta feels warm, turn off heat.
8. Serve immediately. 

Tuesday, October 15, 2013

Healthier Garlic Mashed Potatoes - Dairy Free

          My children and I love mashed potatoes.  No matter how big the batch I made, it is often gone within 36 hours.  I don't know about you, but that simple side dish, when done right, always brings happy memories.  Emotional eating alert?  Who cares! Moderation is key right? As if all of you can resist a creamy, buttery and cheesy potato. 
 
         Anyway, when I learned that we have to remove dairy from our home, one of the toughest dishes I have to remake is the mashed potatoes.  As most delicious recipes available out there, this dish is nothing but a simple concoction of  vegetable, seasonings and a truck load of dairy --- butter, sour cream, cheese, milk, cream.  The more the merrier!
 
         So after tons of disastrous attempts, I finally was able to come up with something that have a creamy, flavorful and yes dairy free version for my food allergy kids.   Surprisingly too, it turned out healthier and very much lower in fat than the traditional ones. 
 
        The trick to this recipe is to add as much flavor as possible.  As you will notice below, I cooked the potatoes in broth.  Use the best one that you can find.  If you are lucky enough to have some cheese, feel free to add a tablespoon or two.  Don't go overboard.  You will be surprise how little you will need. 
 
         Serve this in your next gathering and you will have more room for dessert too! How's that?
 
- Roz            


Ingredients:

1 lb. russet potatoes, skin removed and cut into 2 inch cubes
2 1/2 cups vegetable or chicken stock (enough to cover the potatoes)
2 cloves fresh garlic, smashed
1 1/2 tsp. sea salt
1/2 tsp. ground black pepper (you can also use white pepper)
2 tsp. garlic powder
3 Tbs. buttery spread (I used Earth Balance Soy free) or 2 Tbs. bacon grease (oil from cooking bacon)
2 Tbs. chopped fresh parsley


1. In a stock pot, combine the potatoes, stock and garlic.
2. Bring it to boil.  Once it starts boiling, lower the heat to simmer and cook the potatoes until fork tender.
3. When the potatoes are cooked.  Turn off the heat and remove about 3/4 of the stock and the garlic pieces. Don't throw away the stock.  Set it aside.
4.  With the help of a potato masher, gently mash the potatoes in the same pot.  If it looks a bit dry, slowly add some of the broth that was set aside.  Keep mashing until you reach your desired consistency.
5. Season with salt, pepper, garlic powder and buttery spread or bacon grease. 
6. Mix well and top with chopped fresh parsley.
7. Serve hot.

Thursday, October 3, 2013

Gluten Free Vegan Carrot Cake Mini Donuts

          Ah Donuts! I can't believe how obsessed I have become after purchasing that cute Babycakes Mini Doughnut Maker which my children saw on sale about a year ago.  I can still clearly remember that day.  It was a few weeks after Child #3 was diagnosed with food allergies and our home has to be clear of wheat, dairy, egg, soy, nuts and peanuts.  While grocery shopping, the kiddos gang up on me and sweetly justified why we need another kitchen gadget.
 
           Since I haven't made any doughnuts before, I'm a bit hesitant.  Their positivity, however,  about being able to eat their favorite treat again, made me gave in.   Boy! I'm so glad I listened to them.
 
            Maybe you're wondering why I am so passionate with donuts all of a sudden. Here are the top five reasons.
              1. The mini donuts are portioned and portable.  I can always throw some in the lunch box.
              2. Making my own donuts allows me to add healthier ingredients.  Sneaky way of giving more fruits and vegetables to the kids.
              3. It's baked which means less oil and calories.
              4. Since I make them food allergy friendly, my children don't feel left out or very restricted.
              5. The kiddos just love them! 

           When I was young, I am not a huge fan of carrots.  Everything changed when I had my first slice of the carrot cake from a newly opened bakery near our home.  If something made from carrots can taste as heavenly as that, then vegetables aren't that bad at all.   
 
             This recipe was reminiscent of that feeling.  These doughnuts which are loaded with carrots are a delectable treat without the big guilt.  I often leave it unfrosted to avoid extra sugar and make it school snack friendly.  Dusting it with confectioner's sugar at the end, makes it a pretty dessert too.
 
              Are you craving now?  Me too.  I think it's time to make another batch just for me. Want to give this a try? What are you waiting for?  If you need any help, just let me know.
 
- Roz


Ingredients:

2 Tbs. flax meal
6 Tbs. lukewarm water
3/4 cup sugar (I used Wholesome Organic Sugar )
1/3 cup coconut oil
1 tsp. molasses (you can also use maple syrup)
1 cup rice flour
1/2 cup oat flour
1/4 cup potato starch
1/4 cup tapioca starch
1 Tbs. baking powder
1 tsp. baking soda
1/4 tsp. salt
2 tsp. cinnamon powder
1 tsp. nutmeg
1/2 tsp. Chinese 5 spice powder
1 1/2 cup finely grated carrots
1/4 cup powdered sugar (optional) This will is just for dusting after the donuts are done.

1. Preheat an electric donut maker. 
2. In a small bowl, combine the flax meal and water to make a flax goo.  Set aside for at least 5 minutes before using.
2. Whisk together all the dry ingredients.  Set aside.
3. With the help of an electric mixer, cream the oil and sugar until it is light in color. 
4. Add the flax goo and molasses.
5. Slowly add the flour mixture until just combined. Don't over mix.
6. Fold in the carrots. 
7. Drop about 2 Tbs. of the batter on the donut maker crevices.  Bake for 7-8 minutes.
8. Sprinkle some powdered sugar on top.

Wednesday, September 11, 2013

Mighty Mini Meatloaf Muffins

              School is in full swing and here I am struggling to keep up with the kids' school lunches.  Sounds familiar?  Whether your children have food allergies like mine, are on a special diet or none at all, I'm sure you will agree that packed lunches are always a mom's dilemma.
 
               We are not being picky. We just want to prepare something that is easy, fast, healthy and most of all the kids will actually eat.  Right? Ah, the frustration of seeing the untouched food at the end of the day!  Okay, let's not get emotional here.
 
              Anyway, with those important factors in mind, I'm sharing with you today the recipe for our beloved Mighty Mini Meatloaf Muffins.  Sounds really catchy? Well my kids made it up around the time they were obsessed with the Power Rangers and it stuck. Admit it, you know the song.
 
              One day, while I was preparing to make some Sweet and Sour Meatballs, Child #2 asked if I have the time to also bake some muffins.  When I asked her what flavor she likes, Child #3 who wants to be silly, started saying "You want meat muffins?" Then both child starting asking me if there is such a thing as a Meat muffin.  Feeling adventurous, I told them "Let's make some."  The idea of meatloaf cooked in muffin tins was born.
 
              Since Meatloaf is an excellent dish to sneak in some veggies, I went all out and put a whole pound of carrots.  These not just provided extra vitamins and nutrients, it also gave the dish some sweetness which the kids love.  Most traditional recipes require stale bread for  texture.  Of course, I don't have any gluten free bread laying around the house.  What I do have on stock is rice cereal.   So I made a gamble and use it instead.  The end result is very pleasing. No more leftover cereals!
 
               Have you noticed that each meatloaf is portion sized? This makes it really portable and an ideal lunch box insider.  My kids like it at room temperature which is a big plus. I like to make it ahead of time because it freezes really well. 
 
               Are you excited?  Then give it a try.  Hopefully you and your children will love it too.  One day covered.
 
- Roz      


Ingredients:

3 lbs. ground beef
1 lb. carrots, finely chopped
1 cup chopped onions
2 1/2 tsp. sea salt
1 tsp. dried rosemary
1/2 tsp. dried thyme
2 tsp. garlic powder
1/3 cup crushed rice cereal
1/4 cup non dairy milk (I used flax milk)
1/4 cup balsamic vinegar
3 tsp. coconut aminos (You can substitute gluten free soy sauce or Worcestershire sauce)
1/2 cup tomato ketchup
olive oil for greasing the pans

1. Preheat oven to 375 degrees and lightly grease 2 (12 pcs) standard sized muffin pans. 
2. With the help of a food processor, finely chop the onions, carrots and rice cereal. 
3. Transfer the vegetable and cereal mix to a big bowl. 
4. Add the salt, rosemary, thyme, garlic powder, non dairy milk, vinegar and aminos.  Mix well.
5. Using your hands, slowly mix in the ground beef.  Make sure it is well combined.
6. Fill each muffin cavity to the rim with the meatloaf mix.  Using the back of a spoon, pat the meat to remove any air spots.
7. Top with about a teaspoon of ketchup. 
8. Bake for 16 - 20 minutes.
9. Take the muffin tin out of the oven and let the meatloaf rest in its juices for 5 minutes. This makes sure that the meatloaf stays moist.
10. Serve with mashed potatoes and your favorite vegetables.

Wednesday, September 4, 2013

$1 off Coupon any AppleGate Farm Product

         School is in full swing.  That means we all need extra help not only putting food on the table but in lunch boxes as well.  One of my favorite food allergy friendly meats is from Applegate Farm. They have hotdogs, cold cuts, burgers, bacon and more.   Many of their products are gluten and dairy free. Most importantly, they make soy free items.  Something that quite tricky to find. 


          Want to try them out or need some savings? Click to get your printable $1 off coupon now.

- Roz

Wednesday, August 28, 2013

Almost Perfect Domino's Gluten Free Pizza Review

      As a mom of four kids between the ages of 4 and 10, I am very much familiar with the importance of pizza.  I don't know what's in this dough, sauce and cheese combo that makes children and even grown ups get excited.  Okay, I confess I love the thin crust, meat loaded one.  In fact, it was my biggest craving while pregnant with my eldest. 
 
       Anyway, when we got the news that we must remove food with gluten, egg, dairy, soy etc. in our home because of Child #3's very high risk for anaphylaxis, the one thing that got the kids really worried is the fact that they may not able to eat a slice of pizza ever again.  Though I was able to make a safe pizza for them, I still went on and looked around for pizza places that might offer something that will be appropriate for their food requirement.  A task quite challenging even though we live in a place surrounded with family owned pizzeria in every corner.
 
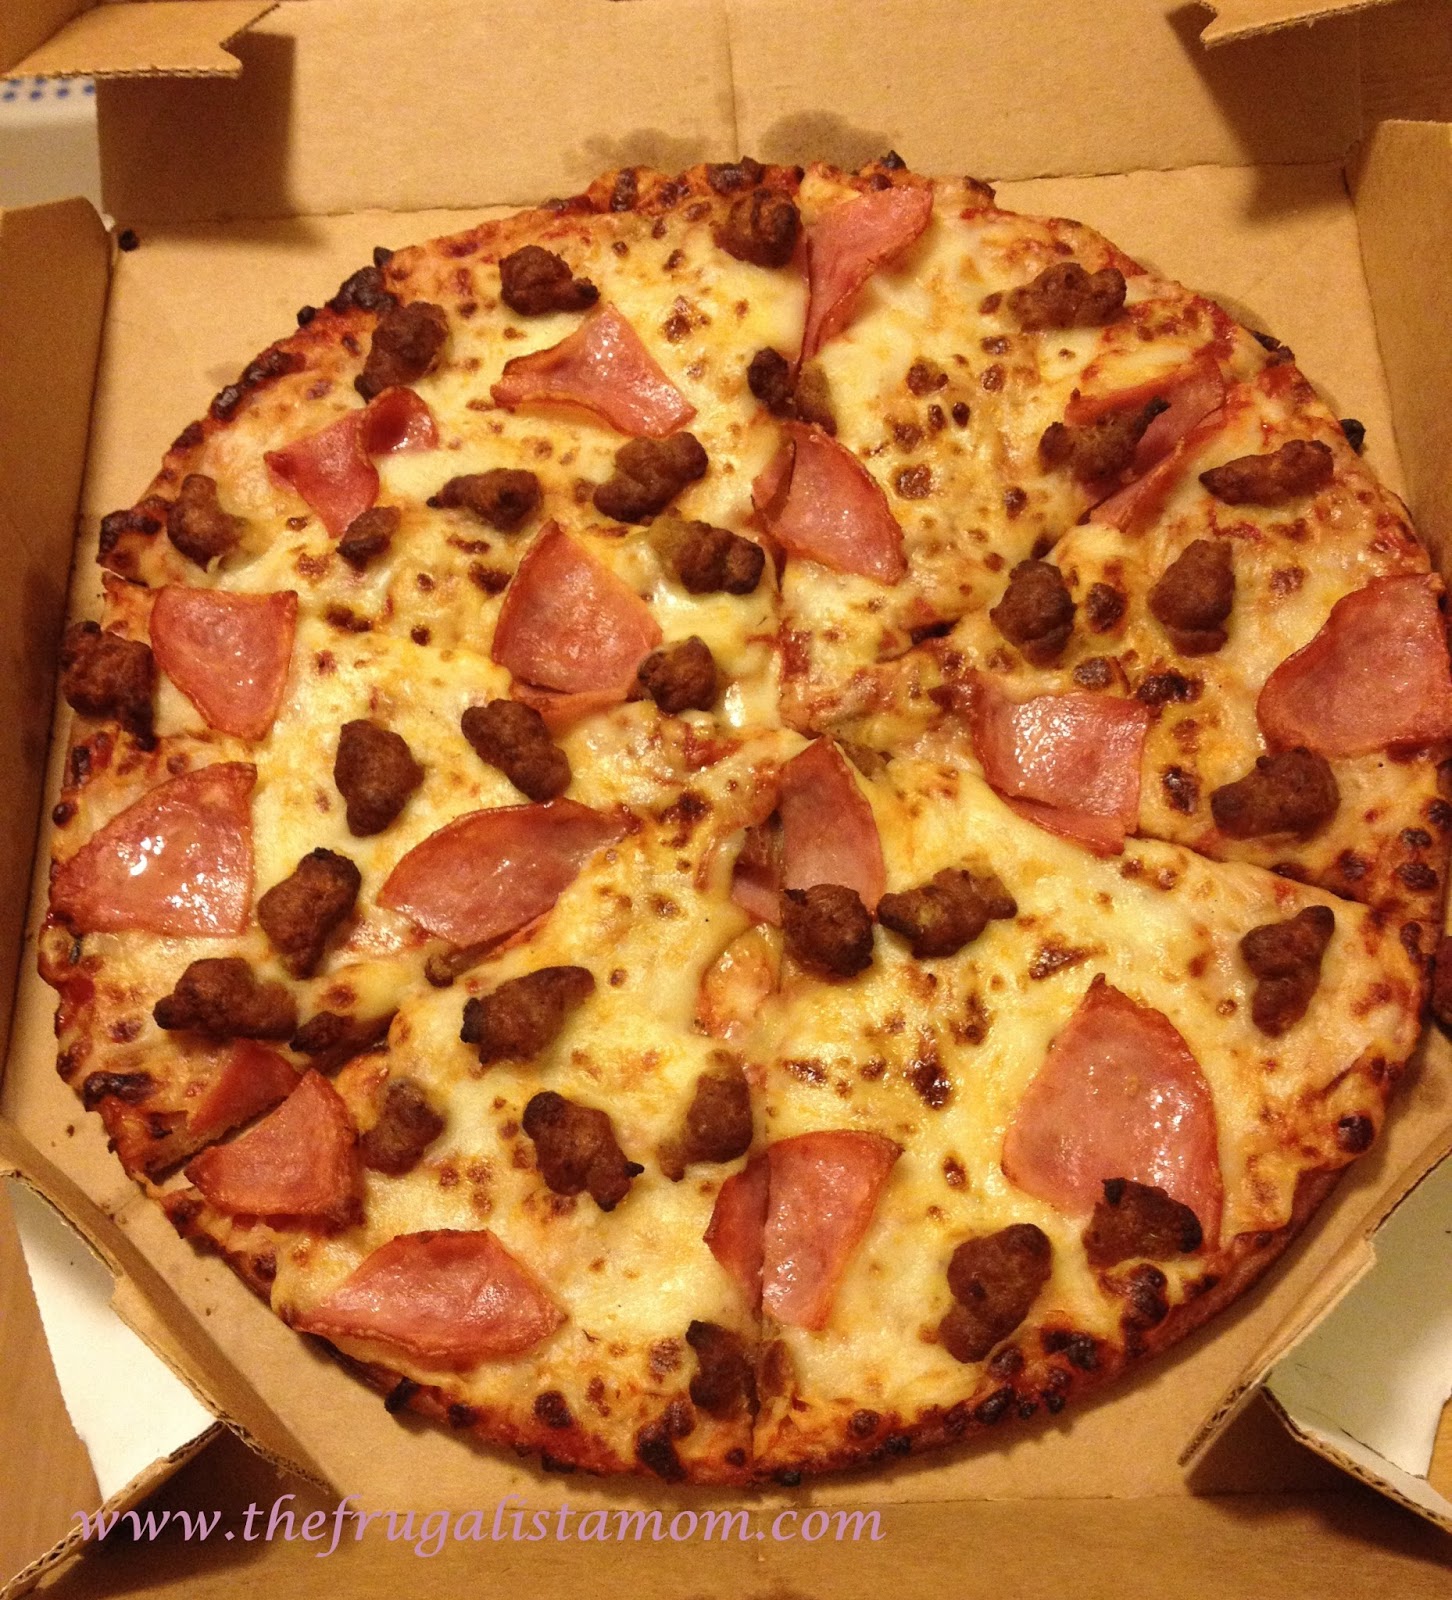
       Then low and behold, I accidentally found out online that the national chain Dominos started to offer a gluten free pizza crust.  After carefully examining the ingredients for the sauce and toppings, I was able to get an almost perfect food allergy friendly pizza treat.  I ordered a pie with a Gluten free pizza crust, Domino's original sauce, topped with Ham and Sausage. 

       Just a quick note.  Domino's has a disclaimer that their facilities/stores are not completely gluten free. Though they try to provide gluten free options, there is still a risk of cross contamination.  I like that they are completely honest about it.  That's why I relied on the consideration of the branch where I ordered my pie.  So far, the one that is closest to our place, was very accommodating and took extra care and caution.  


       When the pizza arrive, I'm a bit disappointed with the size.  I know it mentioned 10 inch pie but it didn't say it will be thin crust!  We have 6 testers remember?  Anyway, I was surprised that the pizza tasted like a normal pizza.  The crust in particular is quite good. It has a bread like texture and the sides are crunchy.  It is very similar to that of a regular thin crust. There is also no after taste that is common among gluten free products. 

       My children who can have dairy, really enjoyed the pizza and gave it a thumbs up.  Child #3 who has a milk allergy but can tolerate small amounts of cheese ate a slice too.  His smile while eating was priceless.  Though he didn't show any reactions after eating, I am not pushing my luck.  After all he is the high risk one. 

       If only Domino's can extend the effort and offer a dairy free cheese option.  Their Gluten Free Pizza, allergy friendly pizza could have been perfect. Oh well, there's no harm in hoping.  Who knows? Maybe in the next year or so.  In the mean time, 2 out of my 4 can have a safe take out pizza.  That makes me a happy mommy. 

- Roz       
        
    
Related Posts Plugin for WordPress, Blogger...