Tuesday, October 23, 2012

Dairy Free Mango Ice Cream

       "No more Ice Cream?" This was one of the first questions my children asked when we found out that our family has to avoid dairy totally.  Since they already knew that regular baked goodies mostly have wheat and so is pizza, they were at least hoping to get to enjoy this well loved frozen treat.  
 
        When my husband heard the kids' inquiry, he wanted to immediately say "Yes, no more ice cream." That response would have been the easiest to do and to deal with but it's just not me.  One, I don't like my children feel deprived or outcasts because of our family's new lifestyle. Two, for the sake of my sanity, I want to avoid chaos among the siblings. The situation where the majority blames the one who has the special food requirements thus starting a "victim/bad guy" episode.  So what did I say instead? "Let's see if we can make one without dairy."
 
        One day, I just realized that I have been eating dairy free ice cream all along. Having spent my childhood in the Philippines, I am accustomed to see an ice cream man or Mamang Sorbetero as what we all call him at almost every street corner. Sorbetes or "dirty ice cream" (I really don't know how that later name came about. Maybe, it's called that way because this type of ice cream was considered street food. I have no clue), is tradionally, made with coconut milk, sugar and natural flavorings such as chocolate, coconut, cheese, ube and my favorite Mango. 

     Since I don't have any access to a real Sorbetero (as if he will share his secret recipe), I tried to recreate this delicious dessert using the most basic ingredients. The result was simply divine.  Armed with my ever reliable ice cream maker, I can now confidently say to my children, "Yes, you CAN have Ice Cream!"


Ingredients:
 
1 13 oz can coconut cream
1 1/2 cups mango puree
1 cup sugar
pinch of salt
 
 
1. In a medium bowl,  whisk together mango puree, sugar and salt until all the sugar is dissolved. 
2. While  mixing, slowly add the coconut cream. 
3. Once fully incorporated, transfer to a container, cover and refrigerate for at least 3 hours.
4. Follow your ice cream maker's instructions for churning time.
5. Enjoy!
 
Note:
       - If you have no ice cream maker on hand, you can improvise by placing the container of your ice cream mix (make sure the lid has a tight seal) inside a bigger vessel (at least double the size of the one that holds the ice cream). Fill the bigger container with ice and a tsp of salt, cover and shake/ roll for about 10 to 20 minutes. 
        - You can also just freeze the ice cream mix.  Results wouldn't be as creamy though.
 
 
      Do you have a favorite ice cream flavor that you would like me to make dairy free? Let me know.
 
-Roz


Wednesday, October 17, 2012

Fish Cakes

       As a Frugalista Mom, I always try to make easy snacks from last night's dinner. Even before our family started to go wheat, egg, dairy, soy and nut free, the practice of creating something out of leftovers is already a must. Not only this habit saves me some precious time but most importantly, it helps a ton in staying within our grocery budget.

       These fish cakes made with already cooked tilapia fillets are a breeze to prepare and are very affordable.  In fact, this recipe enabled me to use the super pricey cheese substitute that we bought and my kids later refused to eat. 

        If you are not concerned about any food allergies, feel free to use regular cheese and mayonaise.  I'm pretty sure, it will turn out good too. 


Ingredients:
5 cups cooked white fish (I used tilapia fillets)
1/2 cup Daiya mozarella style shreds (If you can have cheese, feel free to use it)
1/2 cup Earth Balance Original Mindful Mayo (You can also use regular mayonnaise)
1/2 tsp salt
1/4 tsp ground black pepper
pinch of chili flakes
1 tbs chopped scallions
1 tsp fresh lime juice

1. Using your hands, flake the fish into small pieces.
2. Add the remaining ingredients to the fish.  Mix until well combined.
3. Form into patties about 3 inch in diameter and 1/2 inch thick.
4. Heat a non stick pan or griddle. (medium heat)
5. Place about 4 patties and cook about 4 minutes or until the side near the pan is golden brown.
6. Flip carefully and cook for another 2-4 minutes.
7. Serve hot. 


Note:
     - I used leftover cooked fish in this recipe.  If you don't have any available, you can either bake or steam the fish fillets. Then cool before using. 
     - Since mayo was included in the recipe, you don't need any oil to fry the fish cakes.  In fact, you will see some oil in the pan as it cooks.
     - Make sure you are using a non stick pan and is properly heated before adding the fish cakes.  This prevents it from sticking to the pan.
     -  Depending on your diet, you can serve this over rice, salad greens or even with bread.     


-Roz                  

Monday, October 15, 2012

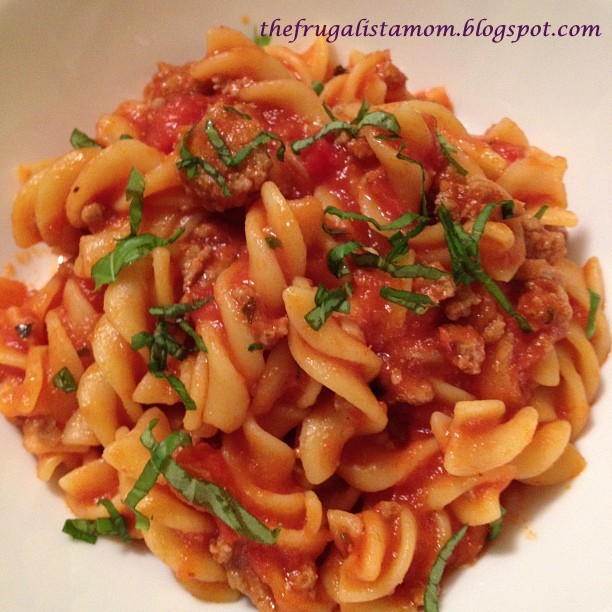
Turkey and Pasta Dinner

     Pasta is always a favorite in our household.  It's versatile, affordable, healthy and easy to prepare. So when we first found out that our family needs to totally avoid wheat in our diet, the kids got worried if they will be able to enjoy their beloved recipes.  Thank God, there is now an abundant selection of gluten free pasta - corn, rice, brown rice, quinoa and more.   Oh, they do come in different shapes too.
 
      Though I have to admit these gluten free pasta are quite pricer than their regular wheat based counterpart, they do pass the taste challenge. In fact, my kiddos like them better than the whole wheat variety which tends to be too hard or grainy. With little alterations in ingredients, we are now able to enjoy pasta dishes that are gluten, egg, dairy, soy and nut free. 

       This ground turkey and pasta dinner is one of the easiest to prepare and is always a crowd pleaser. Yes even those who aren't concerned about food allergies love it. I tend to make a big batch all the time since my children request it for their school lunch the next day.  Plus the extra sauce is an excellent dip for chips too.


Ingredients:
1 16 oz package of fusilli pasta (I used the Wegman's Corn Pasta)
Big pot of hot water for cooking the pasta
1Tbsp. salt (for the pasta)

Sauce:
2 Tbsp. Extra virgin olive oil
1 tsp. minced garlic
1 lb ground turkey
1 23.5 oz Marinara Sauce (I used Wegman's Organic Chunky Marinara)
1 23.5 oz Wegman's Organic Grandpa's Sauce Goes Vegetarian
1 cup water (I used 1/2 cup each to "rinse" or get the leftover sauce out the jars)
2 tsp salt
1tsp ground black pepper
2 Tbsp fresh basil leaves (chopped)


1. Cook pasta according to package directions. Put the salt in the boiling water before adding the pasta.  In my case, I took out the pasta 2 mins before the suggested 14-16 minutes because I don't want my pasta to be very soft when I add it to the sauce.  Rinse the pasta in cold running water. Set aside.
2. In a large pan, heat olive oil and saute the garlic until fragrant. About 1 minute.
3. Add the ground turkey and brown the meat. Stir often to prevent sticking on the pan and to cook evenly.
4. Once the meat is cooked all the way through, pour in the marinara, grandpa's sauce and water. Bring to boil.
5. When the mixture starts to boil, season with salt and pepper.
6. Lower heat and simmer for about 5-7 minutes or until thick. Transfer about 2 cups of the meat sauce to a clean storage container. Set aside.
7. Add the cooked pasta to the remaining sauce in the pan. Mix well to coat all the noodles. 
8. After 5 minutes. Turn off heat and sprinkle the basil leaves.
9. Serve hot.

Notes:
   - I found out that rinsing the pasta is a very important step.  Not only it stops the cooking of the noodles prevents it from being soggy but it also removes some of the starchy or grainy taste most non wheat pasta often possess.
  
   - Feel free to use your favorite homemade pasta or marinara sauce.  I just specified the brand I used because it gave me good results, the ingredients complied with our family's food allergy requirements and each costs less than $3.00.  Making this dish really affordable. 
 
Try it and let me know what you think.
 
-Roz 
 
Related Posts Plugin for WordPress, Blogger...