Showing posts with label chicken. Show all posts

Friday, February 13, 2015

Harvestland Review and $5 Coupon Giveaway

      One of the most important outcome of my children's food allergies is our family's deeper awareness on what is in the food we eat.  During my elementary days, I remember being trained to eat a variety of foods specifically fruits, vegetables, meats/protein, grains and oil.  In order to be healthy, we should avoid processed foods and choose food which are closest to it's natural state.  

      When I learned that I'm expecting my first child, I tried to make sure I provide the healthiest possible for my child.  That included breastfeeding for more than one year exclusively, cooking more at home and even making my own baby food.  Call me crazy but I did that to all four children.  

      After the kids were properly diagnosed with food allergies.  I became more strict with their food.  This meant I have to read everything on the label and even call companies if some of the ingredients were not clear.  

      Can you imagine my horror when I found out that majority of the basics such as milk, vegetables and yes, fresh chicken, pork, turkey and beef were loaded with unnecessary additives like antibiotics, hormones, preservatives and pesticides?  Who knew that the "natural" foods we learned to be healthier are actually filled with toxic products? Even worse is the reality that we are buying and consuming products from sick animals.  Oh and don't get me started on the things going on for ground meat products.  

        Anyway, that's when I decided that no matter how I like bargains, I would be willing to pay an extra dollar or more on the quality of the products I'll buy.  What's the point of spending hours planning meals and home cooking if my ingredients aren't healthy to begin with? 

          That's why when I was contacted by Momsmeet to review Harvestland products, I was so thrilled.  


        Though Harvestland has a wide selection of precooked and processed (sausages, chicken patties), I decided to stick to their fresh raw chicken.  Why?  Well, I want to compare Harvestland to the brands that are cheaper.  For this review, I focused on my favorite whole chicken.  

           As a seasoned home cook, I noticed right away that the Harvestland chicken doesn't have a really thick fatty skin.  Yes, I'm one of those people who actually remove most (not all) of the chicken skin before cooking.  Sad to say, there were times when I felt that about 1/5 of the amount I paid for is being thrown away.  

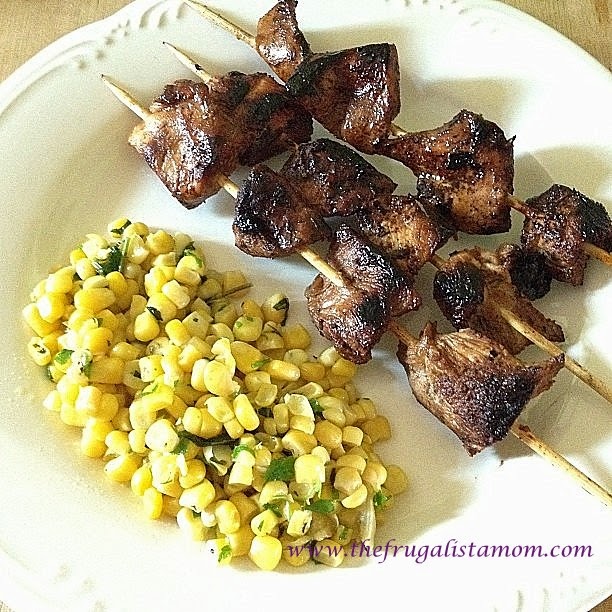
           For the two whole chickens I have, I used one to make Indian Spiced Roasted Chicken and the other for Chicken Tinola.  One both recipes, I realized that each dish has produced lesser water or juices. That meant I was able to get more meat per weight.  Who wants to pay for extra water weight? 

          Was the a significant taste difference that my children can detect on those dishes?  Not really.  However, I'm glad they are actually eating not only a delicious meal but healthier as well --- no antibiotics, pesticides, steroids, hormones.  Don't just take my word for it.  Harvestland is USDA Process Verified.  

       Since it's almost Valentine's day, I would like to give you a simple treat.  I'm giving away a $5 Harvestland coupon to two (2) loyal readers here in the US.  The giveaway starts today and will end on Feb. 27, 11:59pm EST.

          Sounds good?

- Roz
         
(Note: I received this product for free from the sponsor of the Moms Meet Program, May Media Group LLC, who received it directly from the manufacturer.  As a MomsMeet blogger, I agree to use this product and post my opinion on my blog.  My opinions do not necessarily reflect the opinions of May Media Group, LLc or the manufacturer of this product.) 


a Rafflecopter giveaway

Saturday, July 26, 2014

Feel Good Balsamic Chicken Skewers

     "Have no fear of perfection - you'll never reach it."  - Salvador Dali     

   It's been 11 years since I became a mother. That's over a decade of obsessing over my children's clothes, manners, school work, feelings, schedules, parties and the list goes on. Honestly, I can't even recall how many books, e-books, guides, and even blogs I've read just to make sure that I'm on top of our family's activities.  It even came to a point wherein I gave each child his/her designated pen color on the calendar so that I will not miss anything.  OCD alert!

    Then, once in a while, no matter how organized and effective our systems can be, there will be occasions when we just "slip up".  Whether your child has food allergies or not, those rare incidents often leave a tremendous mark in our conscience.  An instant self nomination to the "Worst Mother of the Year Award." 

     My latest nomination happened just before the school ended, I mistakenly thought that Child #3 doesn't need to bring lunch for school anymore.  Since it was the start of the week long early dismissal days, I only sent a package of his favorite seaweed snack and a handful of grapes.  

   "What can possibly go wrong? It was only a Field day and  he will be out at 1 pm."   

    With less than an hour before dismissal, I received a call from the school.  The secretary told me that I need to pick up my son because he has crying inconsolably and it was after the PTO provided the whole school with pizza for lunch.  Panic suddenly crept in.  I immediately asked her if the nurse knew about it and if they administered an Epi-pen shot.  What a huge relief when she told me, my son didn't eat the pizza and in fact, he was not given any at all.   

    When I arrived in school, the principal and his teacher told me about the lunch room incident and my son's refusal to talk to anybody.  At that time, he was already calm inside the classroom and has even asked his teacher if he could wait until dismissal to go home.  A request she gladly approved. 

     On our way to the car, I asked his side of the story.  Tears flowed right away and he told me he was really hungry and there was no food to eat.  He knows he can't have the free pizza and he's only allowed food from his lunch box. It was not about the pizza, it was the fact that he has no food for lunch because he ate all of it during snack time.  He said that he doesn't want to tell them (the teachers and staff) that there's nothing left in his lunch box.   When I asked him why he didn't call me, (our house is less than 1/2 a mile from school and I'm home that day), he said he was really sad to talk.  Heart breaking enough?

    I don't know what else to do to comfort him than promise him that when we get home, he'll have his favorite chicken BBQ with Herbed Sweet Corn. Thank God, I have these marinating for days in the fridge! Within a few minutes, he happily ate his late lunch with a big smile.  Yes! I was forgiven too.  

     This simple and easy to prepare dish is not only comforting but a real crowd pleaser. The trick is it to let it marinade for a long time. It can be stored in the fridge for 3-4 days or longer in the freezer.  It can be cooked on the grill, in the oven and even on the stove top.  

     The combination of sweet, sour, salty and spice is very child friendly. Since the meat is flavored without a sticky and messy sauce, these skewers are perfect for potlucks and even kids' lunch boxes.  For a more grown up version, add a pinch or more of powdered cayenne pepper.  You can also serve it with your favorite dipping sauce.  Child #1 likes it with bottled BBQ sauce on the side while Child #2 likes it with ketchup.  
      
     Is there a dish you often serve to your child when he/she had a bad day?  Love to hear what it is.  
   

- Roz


Ingredients:

1 1/2 lbs. boneless, skinless chicken thighs (or chicken breast)
1 1/2 cup balsamic vinegar
1/2 tsp. ground black pepper
2 tsp. garlic powder
2 tsp. sea salt
1/4 tsp. chili powder

1. Cut the chicken thighs in half.  About 2 inch squares.
2. In a glass container with lid, whisk the vinegar, black pepper, chili powder, sea salt and garlic powder until well combined.
3. Add the chicken pieces and make sure it is well covered with the seasonings.
4. Cover and marinate at least 24 hours in the refrigerator.
5. Thread chicken onto skewers.
6. Lightly oil the grill plate and cook for about 7-9 minutes on each side or until the chicken is cooked through.
    If using the oven, broil for about 8-10 minutes on each side.
    Stove top, lightly grease a cast iron skillet or grill pan.  Place the chicken skewers when the pan is starts to smoke.  Cook for 6-9 minutes on each side or until the juices run clear.


Tuesday, February 18, 2014

No Leftovers Moroccan Roasted Chicken

        The Moroccan culture has always intrigued me.  From the colorful fabrics, unique accessories and of course, spice laden food.  Though I haven't been in an authentic Moroccan restaurant here in NJ yet (any suggestions?), I have spent hours researching about the country's refined cuisine. 

        After going through numerous recipes,  I was surprised to find out that most of the ingredients used in Moroccan cooking are already in my pantry. Okay, I confess I have a long time obsession with herbs, spices, flours and even vinegars.  In fact, my kids has already nicknamed my kitchen, The Lab.  Do you get the picture?       


      Anyway, after gathering some confidence, I finally decided to experiment with the spices I have on hand. Since lamb is quite on the pricey side and I'm not sure if my family will be open to the new flavor profile just  I created, I sneaked my concoction in our weekly roasted chicken dish.  Chicken the kids' favorite so what else can go wrong right? 


        The result amazed not only me but the whole family.  Our usual roasted chicken turned out to be very moist and packed with flavor.  My Moroccan inspired Roasted Chicken became an instant hit!  Even Child #3 who's the pickiest of all, even called it his favorite chicken ever.  

      If you like to make soups out of leftovers, I'm giving you a warning. If you serve this to your family and guests, you will not have enough left!  

       Intrigued?  Give this a try. Then let me know what happens.  

       Have a great week my friends!

- Roz


Ingredients:

1 whole chicken cut into serving pieces
1 whole bulb of garlic

Moroccan Spice Mix
1 Tbs. ground coriander
2 tsp. ground cinnamon
1 tsp. cumin
2 tsp. ginger powder
2 tsp. fennel powder
1 tsp. ground cloves
1 1/2 Tbs. sea salt
1/4 tsp. ground cayenne pepper (You can add more if you like it hot)

1. Preheat oven to 400 degrees F.
2. In a small bowl combine the Moroccan spice mix.  Set aside.
3. Line a 9 x 13 baking dish with aluminum foil.  This makes clean up really easy.
4. Cut the garlic bulb in half horizontally.  Do not remove the skin because it will keep the individual cloves together.
5. Generously rub the chicken pieces with the spice mix.
6. Arrange the chicken pieces and garlic in the prepared baking dish.
7. Bake in the oven for 1 hour and 20 minutes or until the internal temperature of the chicken pieces reach 180 degrees.
8. Once cooked through, remove the baking dish from the oven.  With a fork, carefully, pick the roasted garlic pieces and mash it in a small bowl.
9. Top the chicken pieces with the mashed garlic and let it rest for at least 10 minutes before serving.
10. Serve hot or warm with steamed rice and mixed vegetables.  


Wednesday, October 30, 2013

Chicken and Pesto Spooky Pasta

        Hello Friends!  It's been a while since I posted a recipe right?  To those who are following me on Instagram, thank you for reminding me. 
 
        Since we are celebrating Halloween, I decided to share with you my kids' favorite spooky food.   Funny thing is, I never imagined it as something freaky or even a Trick or Treating dinner staple.  It is pesto sauce for crying out loud! 
 
         I can still remember the first time they saw this dish.  They were so amazed because I was able to make a really "Spooky Pasta".  Was that even a compliment?  Anyway, the color definitely caught their attention and imagination.  The basil and spinach combo gave it a milder taste that the kids enjoyed.  If you have a "veggie - phobic" one just like my Child #2, don't even mention what the ingredients are.  The name "Spooky Pasta" can do the trick.  Green Eggs and Ham anyone?
 
         This kid friendly dish is very easy to prepare and all the components can be made ahead of time. As you may know, pesto can be frozen and so is cooked chicken.   So it is basically a reheat and serve type of dish.  Just make sure that your pasta is al dente to prevent it from being mushy.  Since it is also good at room temperature, it is an excellent lunch box idea.  Oh, did I mention that it's healthy too?     
 
        Happy Halloween!
 
- Roz


Ingredients:

1 lbs. cooked gluten free spaghetti
1/2 lb. chicken breast cut in to 1 inch cubes
1 1/2 tsp. extra virgin olive oil
1/4 cup pasta water (water used to cook the pasta)

Pesto:

1 tsp. minced fresh garlic (about 3 big cloves)
1 cup fresh basil leaves
1 cup fresh baby spinach
1/2 cup extra virgin olive oil (used the best that your budget can allow)
2 tsp. salt
1 tsp. ground black pepper
2 Tbs. canned cannellini beans (rinsed)
1/2  cup Daiya cheddar style cheese (if you can have dairy, use parmesan cheese)

1. Excluding the olive oil, put all the pesto ingredients in a food processor or blender.
2. With the machine running, slowly drizzle the olive oil. 
3. Once everything is well incorporated, stop the machine and set aside.
4. In a heated pan, sauté the chicken in olive oil.
5. When the chicken is cooked through, add the pesto.
6. After 2 minutes, add the cooked spaghetti and toss until the pasta is well coated with the sauce. If the sauce looks dry, add a little of the cooking liquid from a pasta.
7. When the pasta feels warm, turn off heat.
8. Serve immediately. 

Thursday, July 18, 2013

Make it Special with a Budget Friendly Coq Au Vin Blanc

      My friends! Don't let the name scare you.  It is just a French phrase for Chicken in White wine.  If you have been following me (I hope so.), you already realize that I love braising meat and vegetables. I found that this method of cooking easier to manage even it entails a long cooking.  Once it's on the simmering step,  I just set the timer and it allows me to do other things in the house. Cool right?
 
      You might be asking how I can call this fancy sounding dish budget friendly.  Well, when I created this recipe, I made sure I'll only use ingredients that are found in most people's panty.  Also, I cut back on the wine.  Most traditional recipes I know use at least a full bottle.  By just using 2 cups and adding chicken broth, I still get the exquisite aged flavor of the wine in the dish and still have some for drinking later.  In fact, when I first made this, I took the leftover wine in the fridge.  
 
     Just a little reminder though when cooking with wine.  Pick the one that you can drink and actually like.  It doesn't have to be expensive.  There are white wines under $10 a bottle that are good.  One of my favorites is Jersey Fresh wines.  Search for local wines, you'll be surprised that some are really good.
 
        Best thing about this dish is that it tastes better the next day.  This batch produces enough for another day's meal saving you precious time.  Bring it to your next pot luck.  I'm pretty sure your friends and extended family will be impressed.
 
 - Roz


Ingredients:

3 pcs. chicken breast (boneless, skinless and sliced in about 1/2 inch thick)
5 pcs. chicken thigh (bone in and with skin)
1 Tbs. extra virgin olive oil
2 tsp. chili powder
2 cups white wine
2 cups chicken broth (I used low sodium)
1 cup carrots, diced
3 cups potatoes quartered (about 2 inch cubes)
1/4 cup sundried tomatoes, thinly sliced
3 tsp. sea salt
1 tsp. ground black pepper
1/4 tsp. chili flakes
2 tsp. dried thyme
1/2 cup baby spinach (thinly sliced or chiffonade)
1/2 cup white onions, chopped

1. In the medium setting of the stove, heat the oil in a Dutch oven or a heavy soup pot.
2. While the oil is heat, coat the chicken pieces with the chili powder.
3. Brown the chicken in batches, starting with the dark meat.  Set the browned meat aside.
4. After all the meat has browned, sauté the onions and sundried tomatoes in the same pot for 3 minutes or until fragrant.
5. Deglaze the pan with wine and let the alcohol evaporate for about 4 minutes.
6. Pour the stock and bring to a boil.
7. Put back the chicken pieces in the boiling liquid.
8. Season with pepper, thyme and 2 tsp. salt. Bring it back to a boil.
9. Once it starts to boil, add the carrots and potatoes.
10. Lower the heat and simmer for 2 hours.  You can also put the whole pot in a preheated oven at 325F for 2 hours.  If using the stovetop method, stir the mixture every 25 minutes to make sure nothing sticks at the bottom of the pan.  You can forgo stirring if you are using the oven method.
11. After 2 hours, check for seasoning.  Depending on the chicken stock you used, you may need to add the remaining 1 tsp. of salt.
12. Stir in the spinach and chili flakes. 
13. Serve hot with rice, pasta or bread. Enjoy!

Monday, March 25, 2013

Finally A Dairy Free Chicken Alfredo Pasta

      Chicken Alfredo is one of my favorite pasta dishes.  There is something so comforting about the creamy, salty and cheese laden sauce that makes it such a special treat.  So when the food allergy news broke, I thought I will never have the chance to cook this yummy pasta dish at home anymore. 
     
       One day, while preparing for dinner, my children started asking for a white pasta sauce. Just my luck.  How can I possibly make a cream sauce without cream or milk? I'm pretty sure coconut milk, unsweetened rice or almond milk will not be a good alternative because these kids know what an Alfredo sauce should taste like.  Cream cheese even the vegan one is out of the question too because of the soy content. Challenging? Oh yeah.  Impossible? I don't think so. 
 
        While looking for the can of anchovies in the pantry, (Yes! I put some anchovies in my regular Alfredo sauce.) I accidentally came across this can of cannellini beans.  Light bulb moment!  If I can make these beans really creamy and add enough flavor, I might be able to get a taste close to our beloved cream sauce.  So where do I get this weird idea? Okay, I confess, I have an obsession with the show Chopped and it looks like it's paying off. :D
 
        After a few tinkering, I finally came up with this recipe.  Take note that I didn't use any salt because the anchovies gave it the much needed flavor.  If you are not into anchovies, you can use bacon instead.  Simply put raw bacon pieces (about 5 stripes) in a big pan and cook until you have about 2 Tbs. of bacon grease. Remove the cooked bacon and use the grease to sauté the sundried tomatoes and make the sauce.  Once the dish is done, crumble the bacon and sprinkle on top.  You may have to add some salt in the sauce because the bacon doesn't have the same salt content as the anchovies. 
 
        Give this one a try, it's a little healthier than the original Alfredo Sauce too. Who knew cooking food allergy friendly dishes is starting to be fun?
 
        Happy Monday!
 
- Rozelyn


Ingredients:

1 15 oz. can cannellini beans
4 cloves garlic
1 1/2 cup chicken broth
1 tsp. extra virgin olive oil
1 2 oz. can anchovies in Extra Virgin Olive Oil
1 cup cooked chicken breast (sliced thinly)
1/2 tsp. nutmeg
1/2 tsp. onion powder
1/2 tsp. ground black pepper
4 oz. Daiya jack style cheese (shredded)
2 Tbs. sundried tomatoes chopped
3 Tbs. fresh sage chopped
1 lb. gluten free pasta of your choice (cooked according to package direction)
* some pasta liquid (water where you cooked the pasta)

1. Using a blender or food processor, puree the beans, garlic and broth until really smooth and creamy. Set aside.
2. In a big pot, sauté the anchovies in olive oil until it turns into a paste. Mix in the sundried tomatoes and let the flavors blend for about 2 minutes.
3. Add the pureed bean mixture, chicken and season with black pepper, nutmeg and onions powder.  Bring to boil.
4. Lower heat and add shredded Daiya cheese substitute.  Mix well until the cheese melts.  Taste and adjust seasonings if necessary. If needed, add some salt.
5. Add the cooked pasta and stir to coat with the sauce. 
6. Turn off heat and sprinkle the chopped sage.
7. Serve hot. 

Tips:
      If the sauce is too thick, add some pasta water. 
      Puree the beans really well and simmer it for at least 10 minutes to remove the grainy texture.
     

Monday, February 11, 2013

Waist Friendly Crispy Oven Fried Chicken Wings

      Wow!  It's already the 11th of February and I am just here on my first post for the month.  Did I get tired of cooking and finally gave up sharing gluten, dairy, egg and soy free dishes?  Of course not!  Actually, I was quite busy in the kitchen, experimenting on new recipes to recreate my family's well loved comfort foods. 

      Fried chicken wings is one of our all time favorites.  Though it is easy to drench the wings in sauce and let it bake in the oven, there is something so special about that simple wing with crispy coating.  Since I am also trying to lessen our consumption of fried foods too, (okay I confess losing 20 lbs is on my to do list this year),  I decided to play with my gluten free flour collection and my new non-aerosol oil sprayer. 

      After much thought and some trial runs,  I finally came up with this recipe.  The simple technique of misting the coated wings with oil before baking has brought successful results --- crispy coating, juicy meat and yes, way less calories than its deep fried counterpart.  Warning! This is highly addictive so make sure you have company when you make this. 


Ingredients:

24 pcs chicken wings (thawed)
1 cup cornstarch
1 tsp fine ground sea salt
1/2 tsp garlic powder
1/2 tsp paprika
olive oil or canola oil in a container with spray

1. Preheat oven to 400 degrees F.
2. Line a baking sheet with foil and lightly spray with oil. Set aside.
3. In a shallow bowl, combine cornstarch, sea salt, garlic powder and paprika.  Mix well.
4. Coat the chicken wings with the flour mixture and arrange on the prepared baking sheet.  Make sure each piece is not touching each other and has enough space around. 
5. Lightly mist the coated chicken with oil.
6. Bake for 45 - 55 minutes of until the chicken has a golden brown color and the juices are clear with when pierced.
7. Take out of the oven and let it rest for 5 minutes before serving. 
8. Serve with your favorite sauce.

Enjoy!

- Roz


Friday, December 21, 2012

Chicken Marsala - Gluten Free Recipe

      Chicken Marsala is one of my favorites. It's simple to prepare and only requires just a few ingredients.  When our household became gluten, dairy and egg free, I thought I will have a tough time remaking this dish.

        Last month, while wine shopping at Wegman's, I accidentally passed by the Marsala wines. With just 2 bottles remaining, I had this urge to grab one.  The next day, I worked on my new version of Chicken Marsala.  With a little tinkering on the breading, I was able to come up with a dish that I'll say even better that my regular recipe. 


Ingredients:

5 pcs. Skinless, boneless Chicken breast portions

Breading Mix:
2/3 c Waterchestnut powder (you can also use corn starch)
1 tsp sea salt
1 tsp garlic powder
1 tsp paprika
1/2 tsp ground black pepper
1/2 tsp dried oregano
1/2 tsp chili powder

Sauce:
1 cup Marsala wine
16 oz chicken broth
2 Tbs. sea salt
1/2 tsp dried oregano
1/2 tsp ground black pepper
1/4 tsp chili flakes
2 Tbs vegan buttery spread (or regular butter)
4 Tbs olive oil
3 medium sized bell peppers (cut into strips)
1 medium sized onion (sliced in half moon shapes)
1/4 cup chopped fresh parsley

1. Prepare the chicken breast by slicing it in half and pounding it to about 1/4 inch thick.  Set aside.
2. In a big shallow bowl, combine the ingredients for the breading mix.
3. Heat a big skillet and add the olive oil.
4. Coat the chicken pieces with the breading mix and pan fry in batches.  About 3 minutes on each side.  Do not overcook.
5. Using the same pan, add the butter and saute the bell peppers and onion.
6. Once the onions turned translucent, add the marsala wine to deglaze the pan. Make sure to scrape the browned bits.  Those are full of flavor.
7. Pour in the chicken stock and bring the mixture to a boil.
8. When the stock starts to boil, season with the oregano, black pepper, chili flakes and 1 Tbs. of sea salt. 
9. Taste the sauce.  If you think it needs more salt, slowly add the remaining 1 Tbs. tasting after each addition. The amount of salt you will use depends on the type of stock you used. 
10. Put the chicken pieces on the the pan with the sauce and simmer covered for 20 to 40 minutes.  Stir occasionally to prevent the meat from sticking on the bottom of the pan.
11. Turn off heat and add the chopped parsley.  Mix before serving.

Enjoy!

-Roz


Related Posts Plugin for WordPress, Blogger...